


Join our Telegram channel to learn more!
When you first create a WordPress website, one of the essential pages that you need to have ready is the contact page. Whether you’re a blog, a business, or anywhere in between, having a contact page is great for your users to communicate with you and ultimately create a more engaging experience.
Now, some of you might be wondering as to why you would need a contact page in the first place when you can just display your email instead for users to reach out to you.
Here’s the thing, adding a contact page is more than just giving a means for your users to contact you. It’s a way to show your sincerity and also a necessity to grow your blog. In fact, there are a bunch of benefits for having a contact page instead of just using an email address.
Some of those benefits include:
So, now that you know why it’s important to have a contact page, let’s take a look at how to create a simple one for WordPress.
The first step for creating a contact in WordPress is to install a plugin for it. In this article, we’re going to use the WPForms Plugin. Since they offer both free and paid versions, it’s a good choice for you to get started with.
WPForms’ contact forms are 100% responsive and mobile-friendly
Of course, you can choose to use any other plugin that you want and the steps will generally be the same.
Once you’ve installed the plugin, head to the setup screen, create a name for your form and choose the Simple Contact Form template.
This will create a simple contact form that you can choose to customize. You can add additional fields to your contact form by simply dragging and dropping them from the left hand of the panel to the right.
It’s simple to create your first contact form using WPForms
You can also click on the field itself to make any changes, or click on the form fields and rearrange the order of your contact form by dragging it. Once that’s done, go ahead and click save and continue on to the next step.
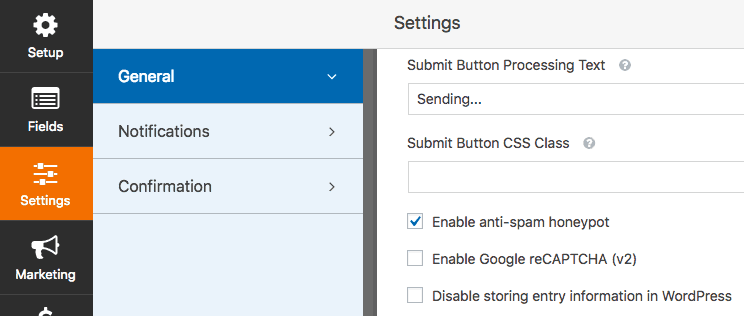
WPForms general settings
Here’s where we edit some of the general settings for your contact form. Click on “Settings” and the “General” menu to configure the following parameters.
Click save once you’re all done and proceed to the next step!
So, when a user submits a contact form, you’re going to need some form of notification to inform you of that. Under the “Settings” and “Notifications” menu, you can configure the settings such as the email where the notifications will be sent to or the subject line.
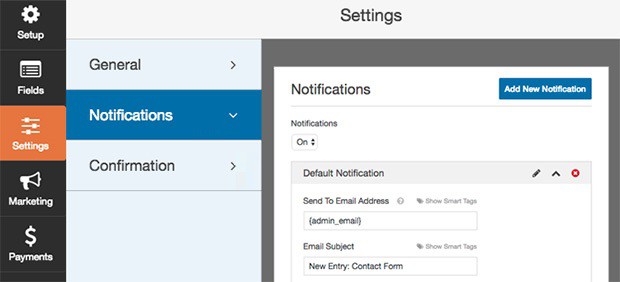
You can add a new notification for different purposes
Normally, when you first install the plugin, this feature will always be turned on. That way, when someone submits a contact form, you will always get a notification about it via your email.
Pro Tip
If you want to the extra mile and have a consistent branding, you can choose to add a custom header to your email template. Here’s a quick guide you can check out.
After submitting a contact form, a form confirmation is a great way to let your users know that the form they submitted has been processed and gives you a chance to inform on what to do next.
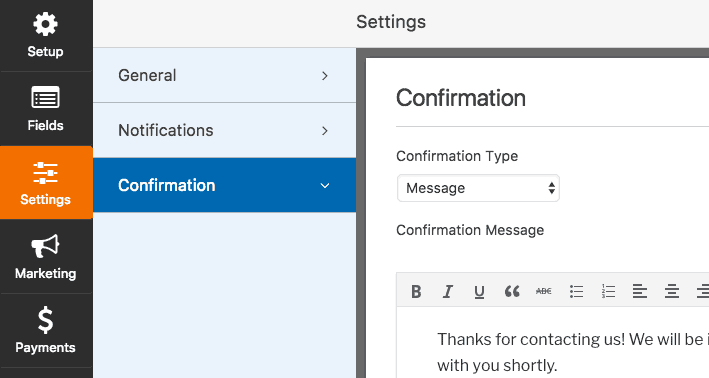
You can customize what users see after they have submitted a form
Typically, form confirmations can either be a:
Now that you know the different types of confirmation that WPForms has to offer, let’s take a look at how to configure and customize the message that your users will see once they submit a form.
First, head to the “Confirmation” tab that’s located in the Form Editor under “Settings”. Next is to select a confirmation type. We’d recommend using the “Message” as it’s easier for beginners.
You can then customize the confirmation message and once you’re done, go ahead and click save. Now, all that’s left is the last step, adding the contact page!.
By now, you should have a contact form page ready to go. All you need to do now is to actually add it to your WordPress website.
While the plugin lets you add a contact form to multiple locations at your website (blog posts, sidebar, etc.), we’re going to focus on the simplest method, which is to add a new page.
Adding your contact form to a page or a post
What you need to do is create a new post or page in WordPress and then click on the “Add Form” button. Next is to select your contact form in the popup menu and click on “Add Form”.
All that’s left is to publish the post or page and then the contact form will appear on your WordPress website.
Voila! You now have a brand new contact form page on your WordPress website that your visitors can use to contact you.
Having a contact page is useful to create communication between you and your users. If you want to understand your users better, visit our earlier post on how to add Google Analytics to your WordPress.
Jason is a fan of WordPress and technology. He is also a marketer - Jason likes to read news related to startups and internet marketing. You can connect with him via Twitter.

