


Join our Telegram channel to learn more!
This step-by-step tutorial will show you EXACTLY how to set up an online store on WooCommerce. Millions of eCommerce businesses are crazy for this WordPress plugin – and it ain’t hard to see why!
Here’s what I’ll cover:
Basic Info & Requirements
Store Installation, Setup & Configuration
Store Management & Optimization
Wrap Up
Most WooCommerce tutorials I saw were outdated, so this updated article should provide you something closer to reality. I’ve also made sure to include lots of timeless tips and examples.
You’ll learn how to start with WooCommerce, configure settings, add products – and lots more. Plus, you’ll learn where everything is, so you can start managing your store.
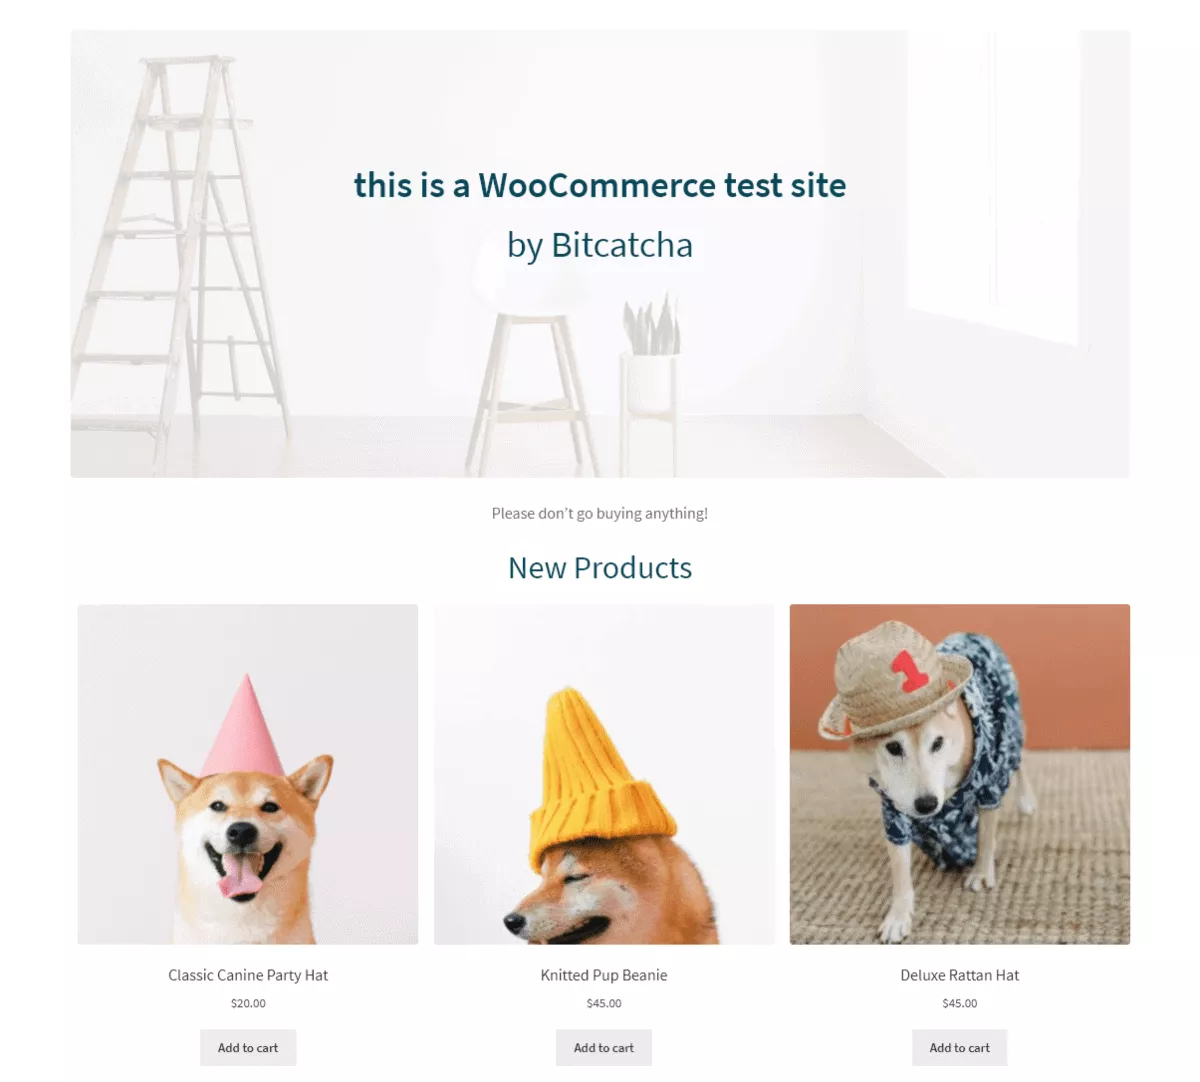
And to guide you through each step, I’ll be setting up my fake online hat shop right alongside you.
With over 5 million installations, WooCommerce is one of the most popular eCommerce platforms to build an online store.
The beauty of WooCommerce is that it not only helps you design your storefront, but also looks after the trickier sides of eCommerce: things like accepting payments, managing your stock and tracking orders.
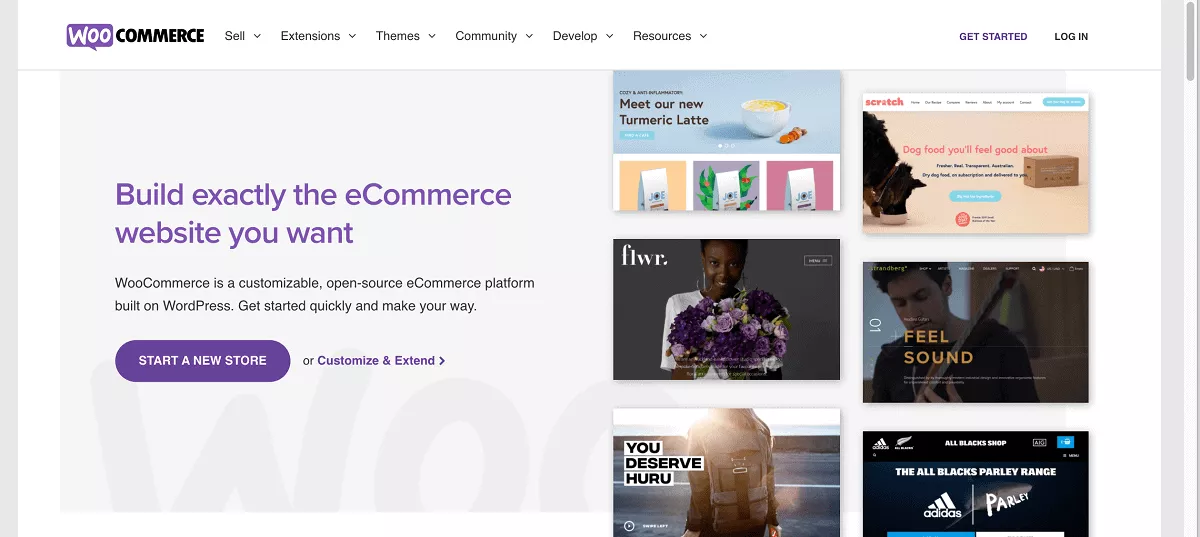
Best of all, WooCommerce is free and fairly easy to use. It slots into your WordPress website, and does all the heavy lifting for you.
WooCommerce is a WordPress plugin, which means you first need to have a functioning WordPress site.
If you’re starting from scratch, here’s a summary of the things you’ll need:
Both WordPress and WooCommerce are free, but you’ll need to pay for your web hosting and domain name. In the next section, we’ll cover how to get started.
If you already have a WordPress site, skip ahead a few paragraphs to the WooCommerce section.
To set up a WordPress website, you first need a strong web host and a domain name.
We highly recommend you pick a host that’s optimized for WordPress. Our top pick for WordPress sites is Hostinger, but feel free to check out our comparison of the top WordPress hosts if you like.
You’ll also need to register a domain name. Many hosts (including Hostinger) will include a free domain in their plans, but you can also use a separate domain registrar and then link your domain to your web host manually.
When you’ve purchased your hosting plan, you should receive an email from your web host with instructions on how to access your account.
Log in and locate your control panel, then look for the section that allows you to install software. These vary depending on what host you’re using, for example – hosts that use cPanel will use Softaculous.
On Hostinger – look for the ‘Auto Installer’ area.
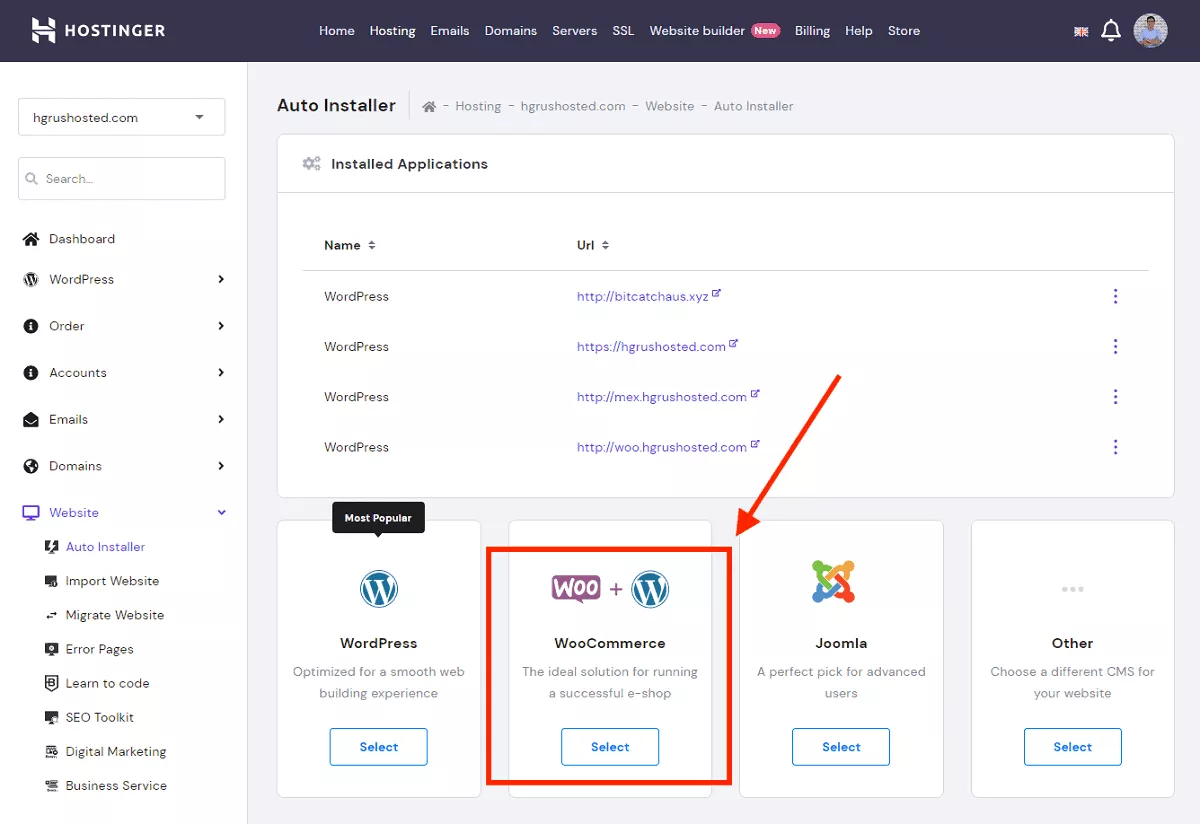
Hostinger has a really helpful dedicated button to install WooCommerce + WordPress together in a single step. You just need to click ‘Select’, fill in some details, and your WordPress site will be installed WITH WooCommerce.
If you’re using another hosting brand with cPanel, you’ll need to do this in 2 separate steps.
Security Tip
It’s especially important for online stores to install an SSL certificate, so customers trust your site. Check with your web host on how to install yours.
Make sure you’re logged into your WordPress site. The easiest way to do this is to click on your address bar, and type in your site URL followed by /wp-admin/
For example, if my site is www.blueshirt.com, I’d type in www.blueshirt.com/wp-admin/. You can then log in using your WordPress username and password.
You should now see a WooCommerce welcome message inviting you to run the 6-step WooCommerce setup wizard.
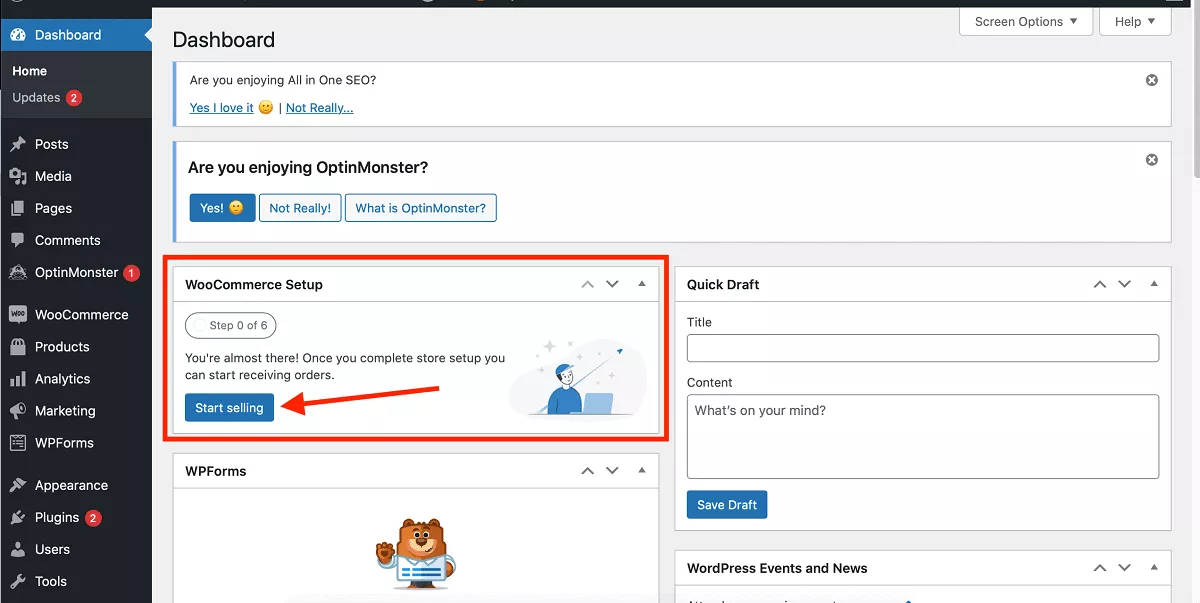
In theory, you can skip this and set up WooCommerce manually. But why make life difficult?
Click ‘Start Selling’ to launch the wizard. Here’s what you’ll be asked to do:
By adding in your address, country/region, and postcode.

Tick all that apply.
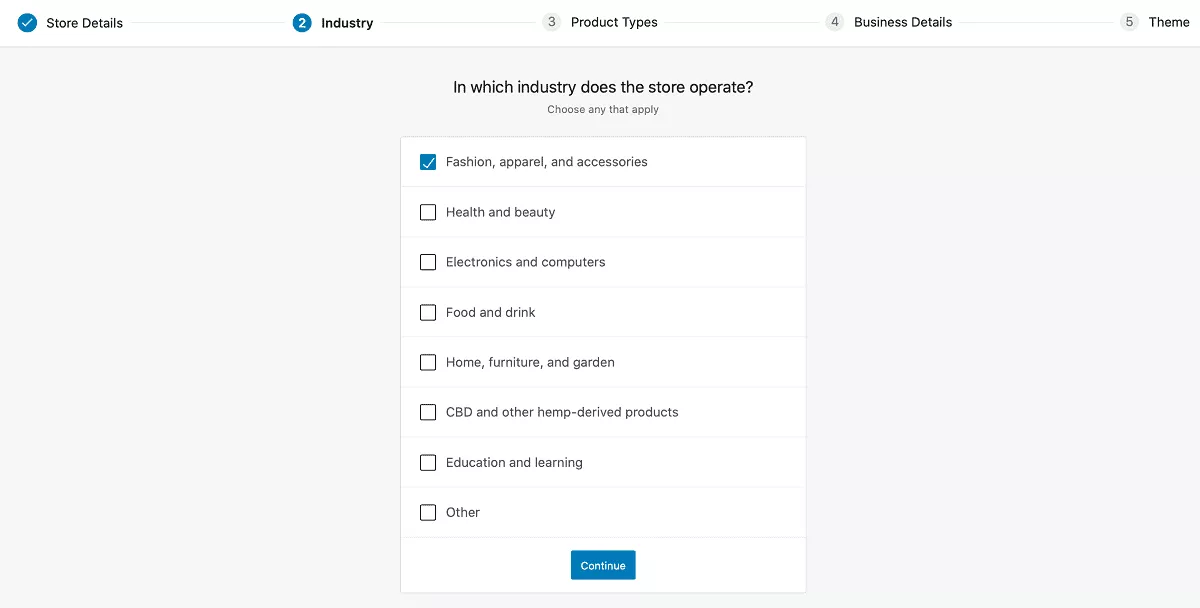
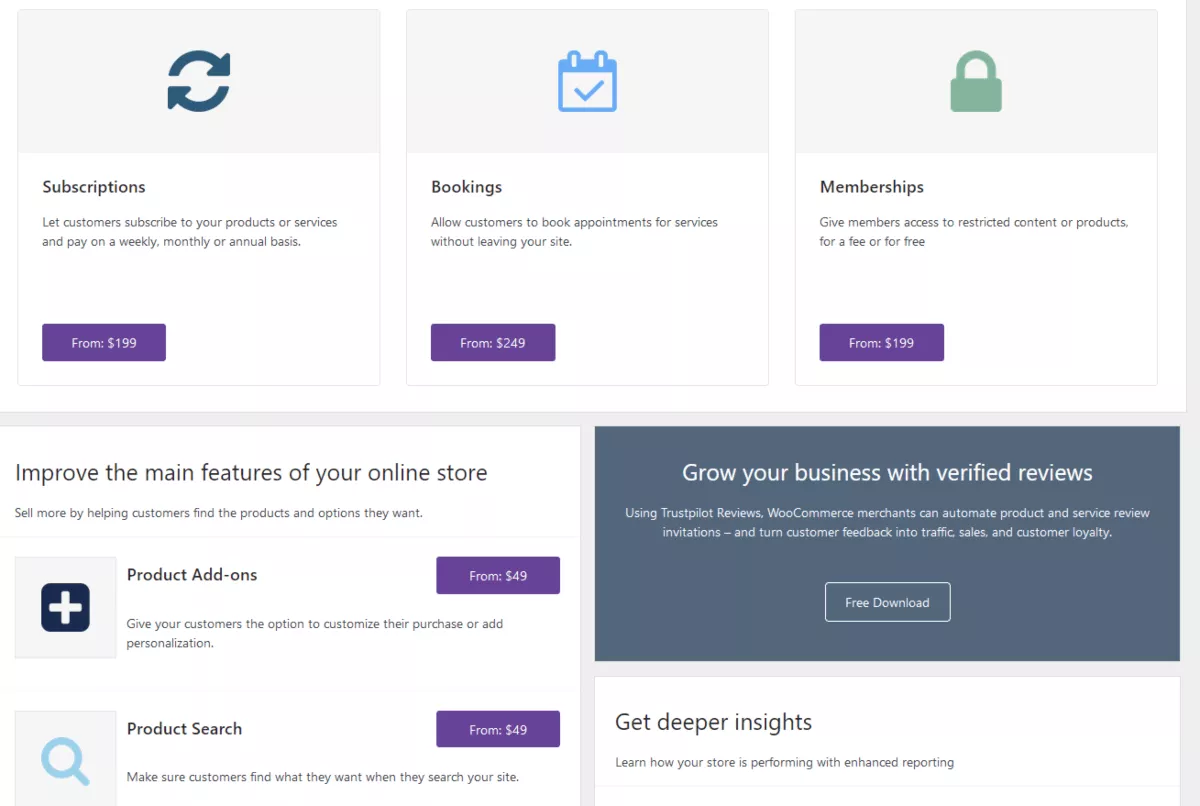
Indicate the types of products that you’ll be selling.
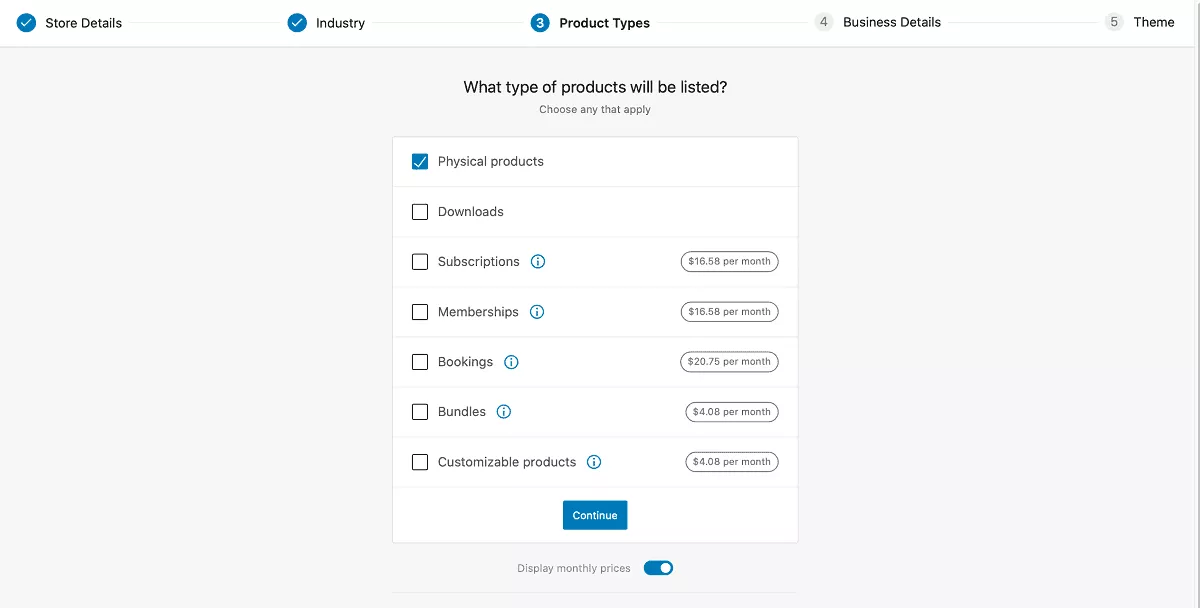
You’ll notice there are some paid options for certain types of product, such as ‘Subscriptions’ and ‘Memberships’. You can hover over the ‘i’ to get more information on these, but for this article I’ll be sticking to ‘Physical Products’.
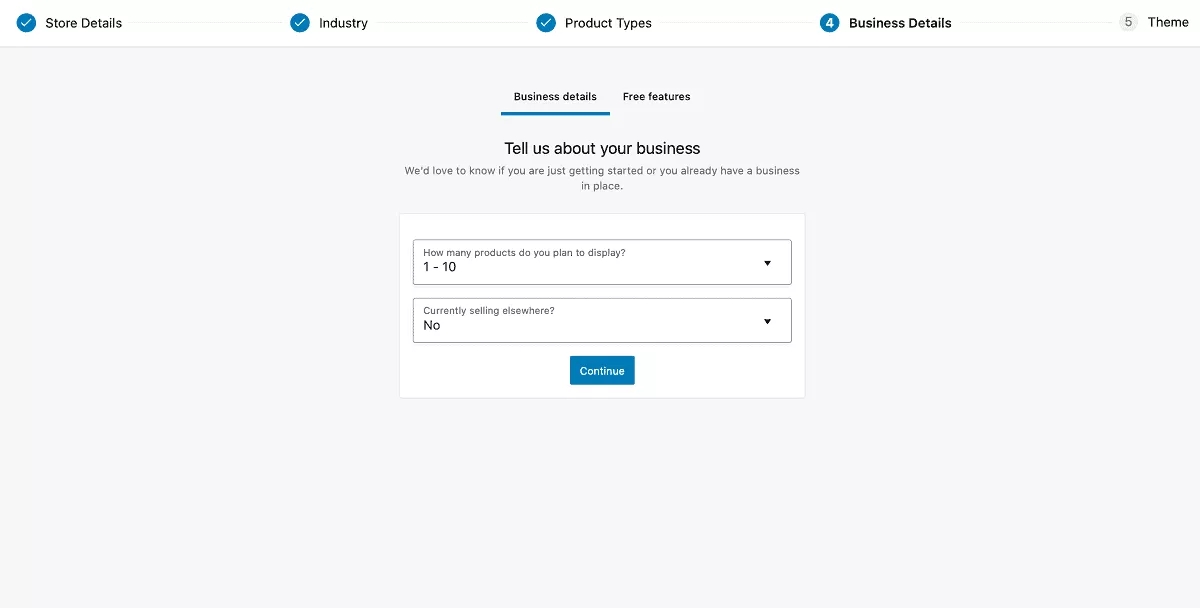
Indicate how many products you’ll display and if you’re currently selling your products anywhere else (e.g. in a physical store, or on another eCommerce platform).
Click on the little arrow next to the text that reads ‘Add recommended business features to my site’ to expand the full list. You can then individually tick or untick the ones you want.
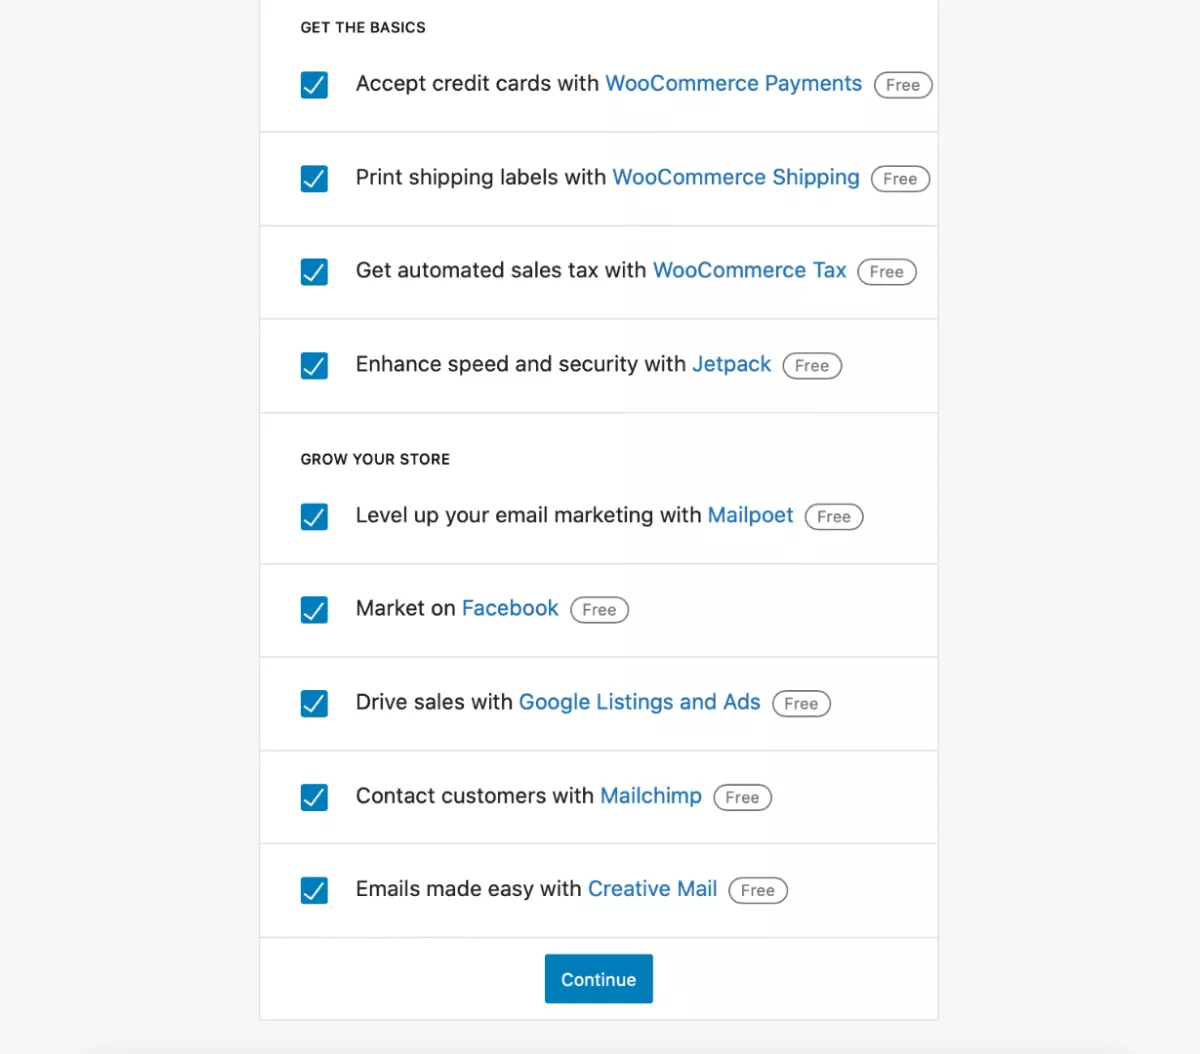
This is a fairly new feature that can be very helpful for beginners since you can install a lot of recommended plug-ins all in one go – but that’s not to say you need them all.
Here’s an overview of some of the plug-ins you might see.
Don’t worry if you don’t want to decide now – you can always install the plugins later on. When you’re done choosing – click ‘Continue’.
Installing these may take some minutes. Don’t panic if it’s slow. Make a cup of tea.
Your theme will be the basic layout of your site, which you can later customize more to your liking. You can click the tabs to browse Paid and Free themes.
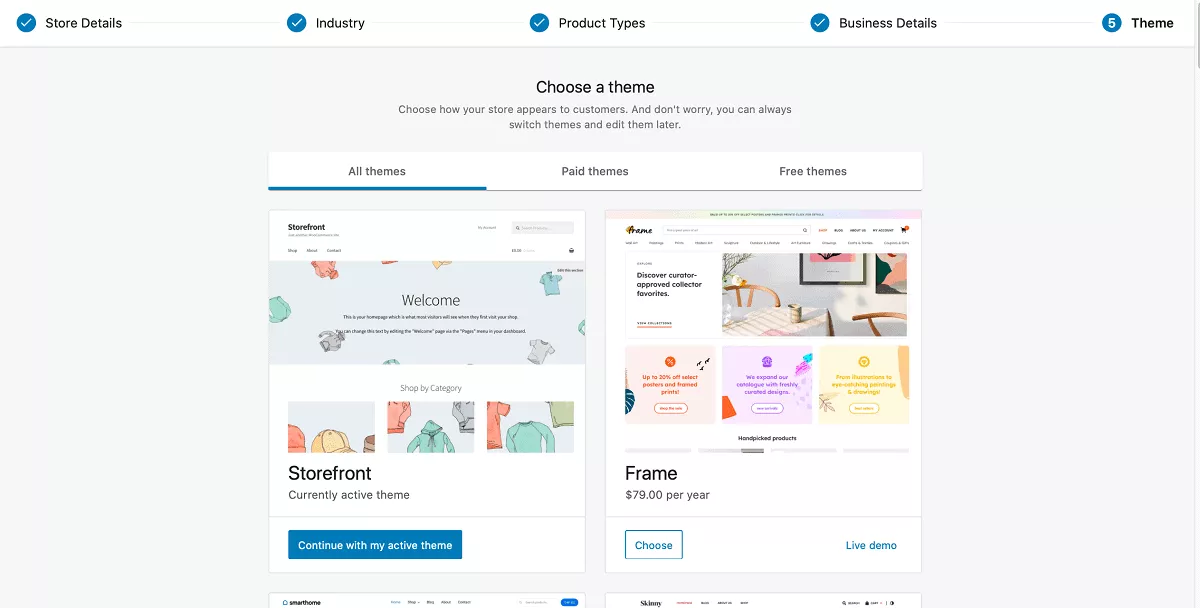
When you find a theme you like, click ‘Choose’. And don’t worry – you can always change your theme later.
I’ll be sticking to the free theme ‘Storefront’, so I’ll click ‘Continue with my active theme’.
If you indicated earlier that you wanted to install ‘Jetpack’, you’ll now be prompted to set up a Jetpack account. You’ll be directed to the Jetpack interface, where you should scroll down until you see something along the lines of ‘Get Started For Free’. Click on this and follow the on-screen steps.
You should eventually end up back on your WooCommerce dashboard where you’ll see a list of things to do in order to ‘Finish Setup’.
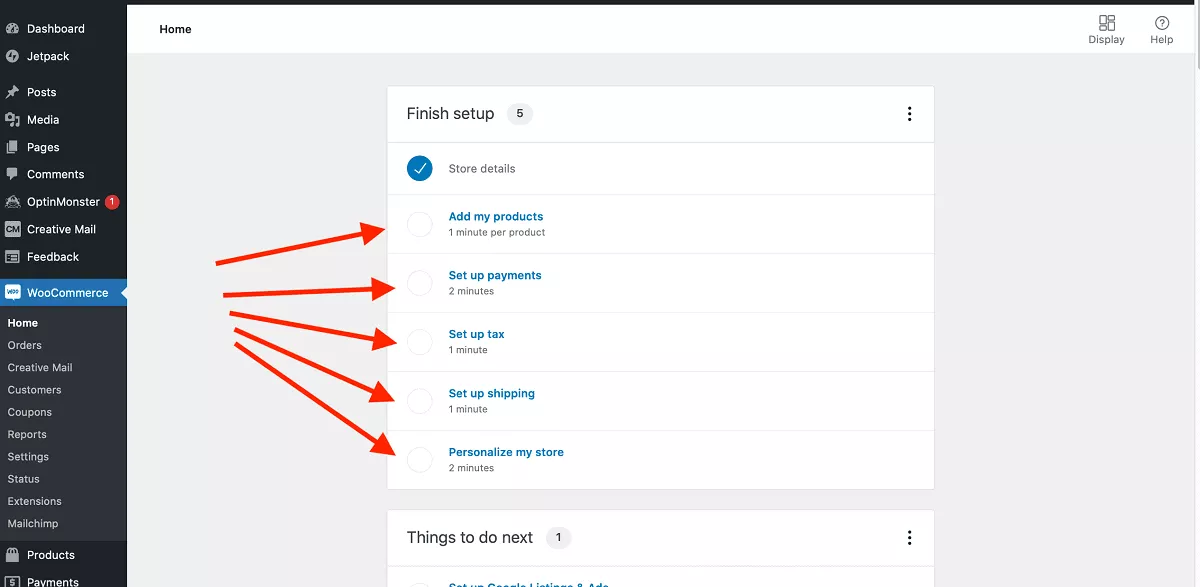
In the Finish setup area, you’ll see a road map of things to click through and complete:
I’m going to take you through these below.
Helpful Note
If you ever get lost and want to return to this Setup page, just click ‘WooCommerce’ in the left menu bar of your WordPress dashboard.
Right – let’s add your first product.
It will give you the option to use a Template, Add Manually, Import larger CSV files, or Import From Another Service (e.g. if you’re currently selling on another platform).
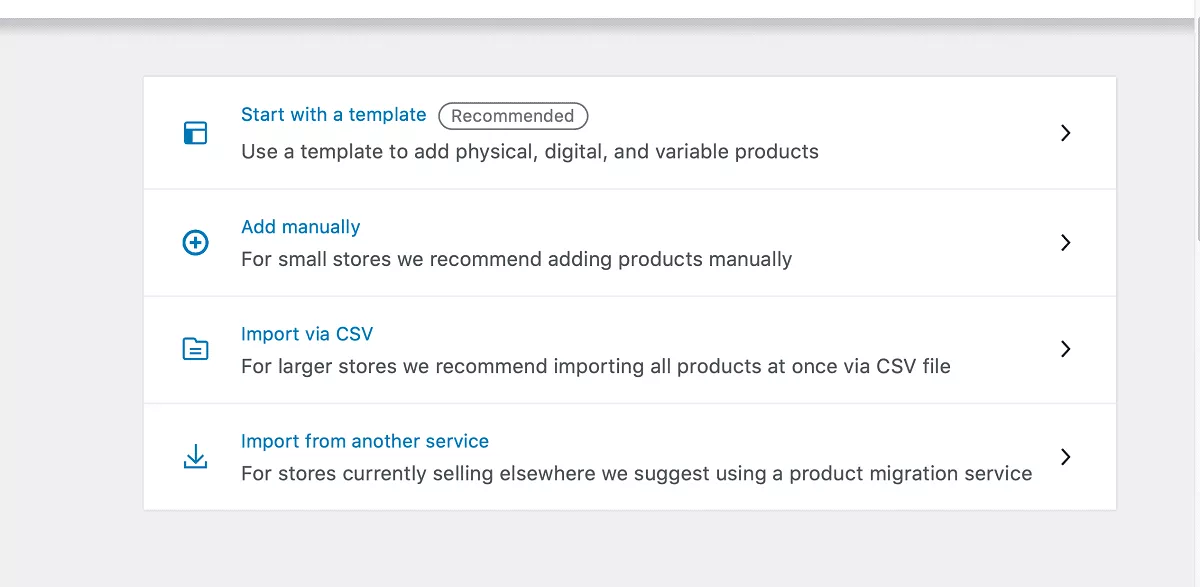
If you want to start adding products – click your preferred option, and follow the on-screen instructions. Otherwise you can skip this bit for now – I’ve included a more detailed section on adding products later in this guide.
WooCommerce will give you a range of payment options:
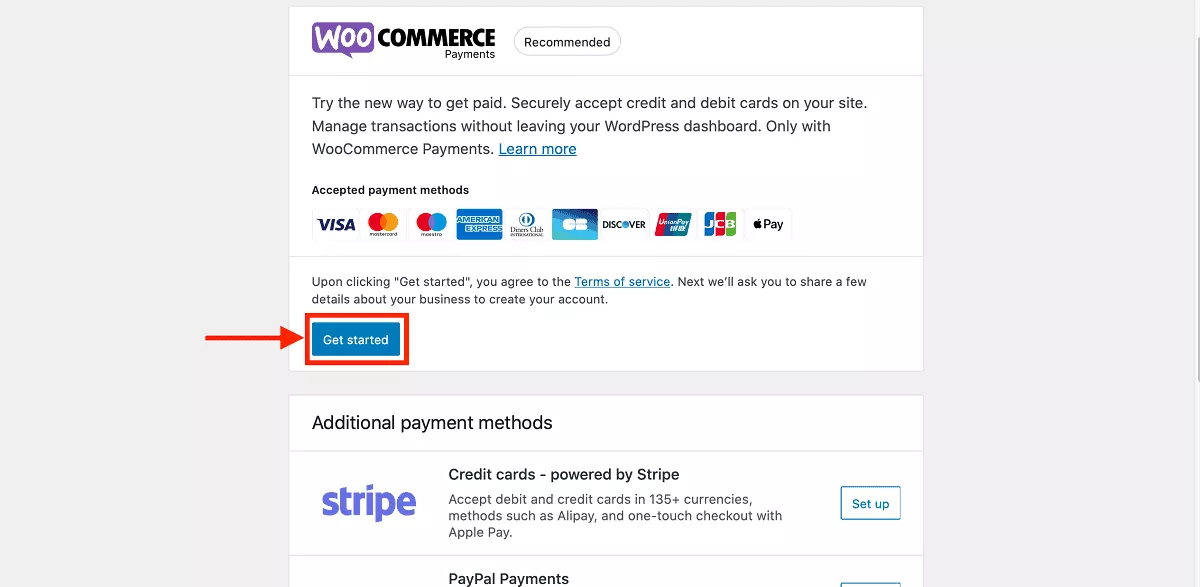
I recommend you click ‘Get Started’ and follow the prompts to set things up.
The easiest way is to simply automate your tax calculations by using Jetpack and WooCommerce Tax. You just need to enable this.
Or if you really want – you can set up tax rates manually.
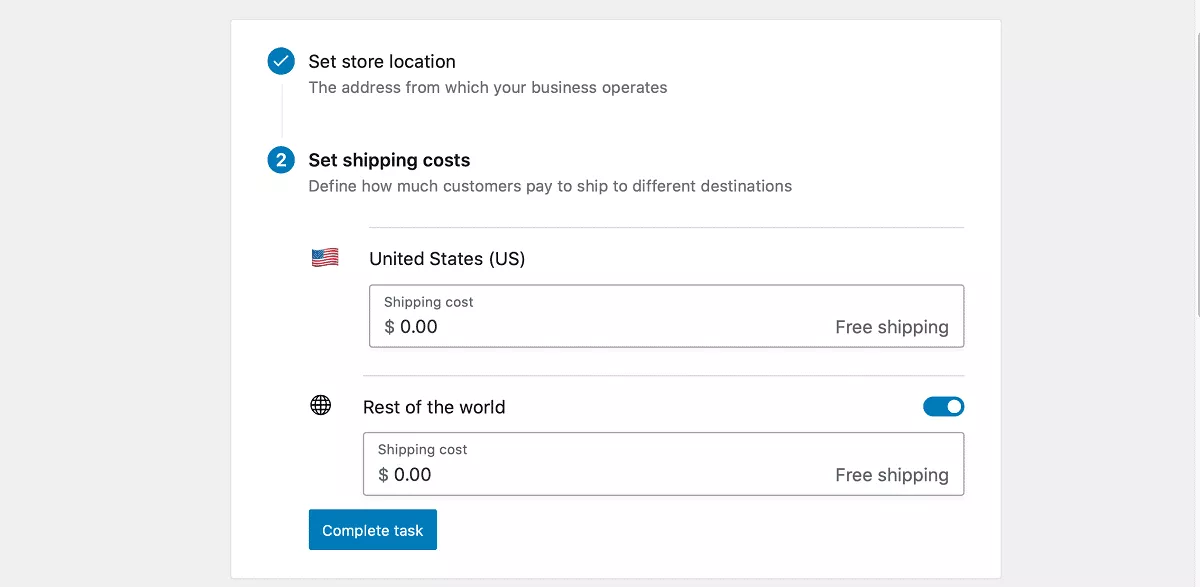
Here, you can indicate the shipping costs that customers need to pay, depending if they’re in your country or overseas.
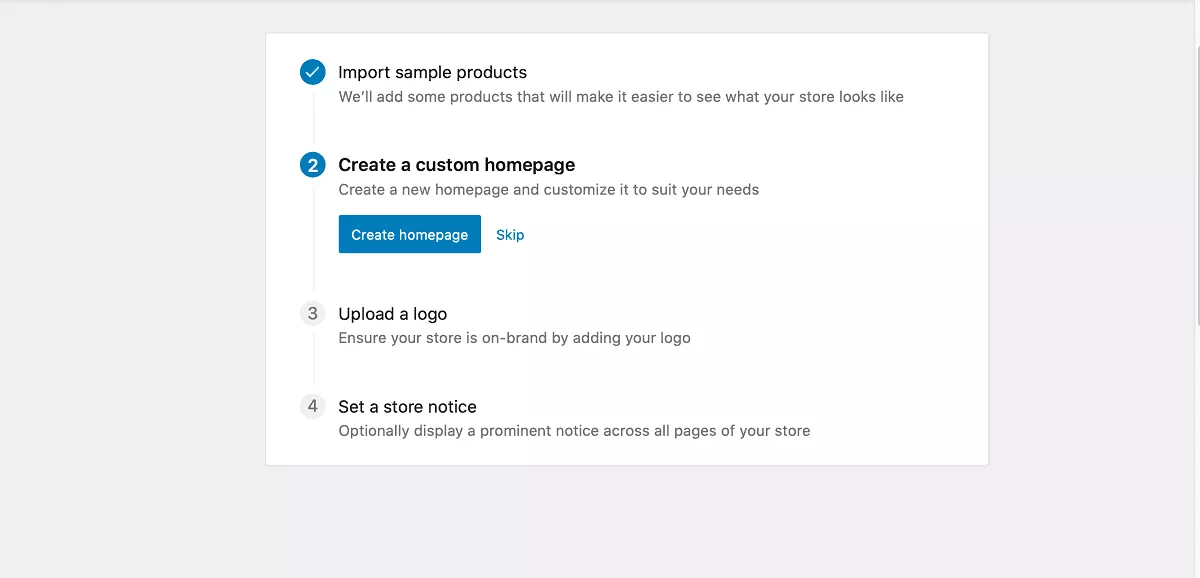
Now is the time to create a custom homepage (clicking ‘Create homepage’ will just generate the page – you’ll customize it later), upload a logo, and – if you want – add a notice that will display across all pages of your store.
So – that’s the overview of the set up process. Now, let’s go into more detail into some of the more important functions you’ll want to spend more time on.
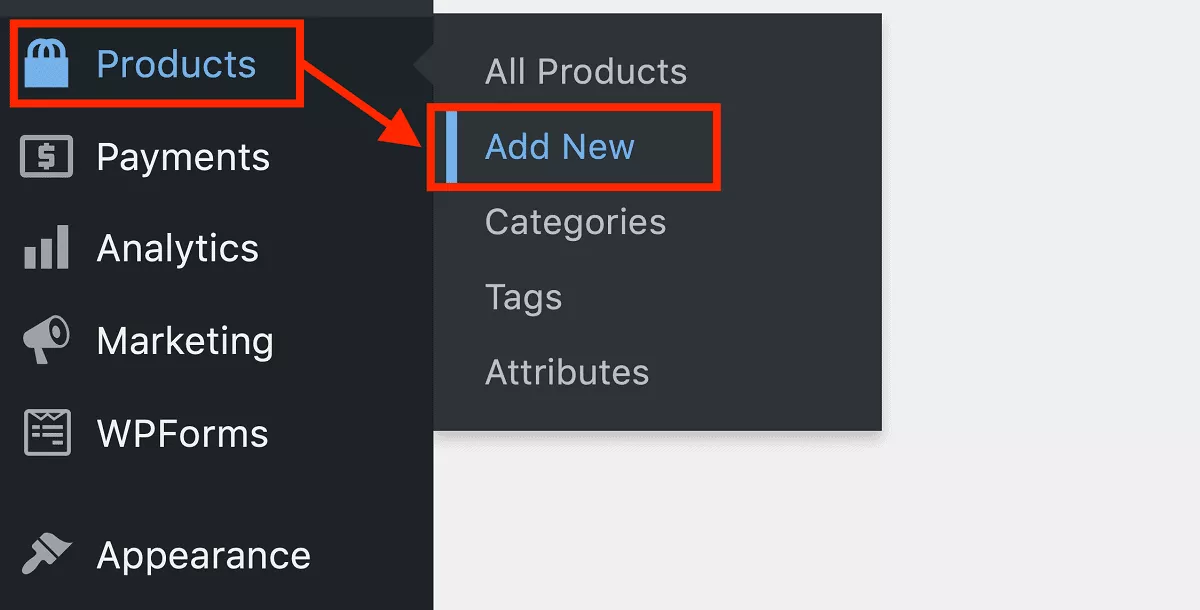
Now I’m going to take you through the simple process of adding products to your store.
Simply click ‘Products’ on your left menu bar -> Add New.
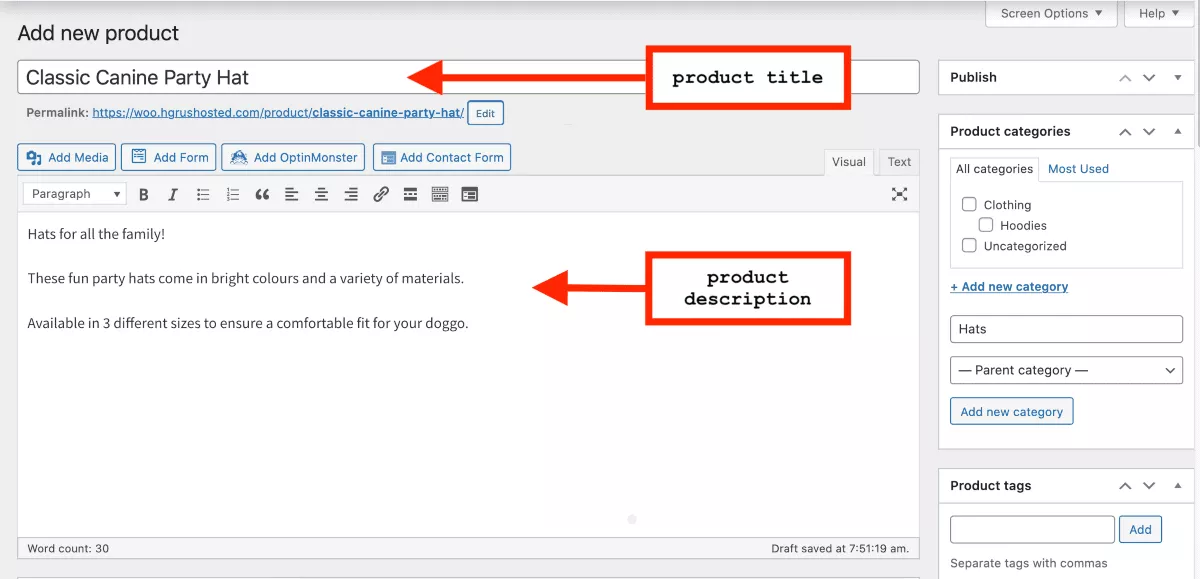
First, you need to provide a title for your product and then a detailed description.
Make sure your product title is accurate and descriptive. Your product description should help readers understand the product and how it’ll bring value to them.
I typed in something quick below, for illustrative purposes only. But make sure you spend your time on describing your product well! Definitely read our guide on how to write a persuasive product description.
Then, you’ll want to choose a category for your product. Look for the ‘Product Categories’ box on the right, and click ‘+ Add New Category’.
You can now create a Category for your product so that it’s easier for customers to browse your products on the site. In my case, I’ve added a category for ‘Hats’. In future when you add more products, you can put them in the same category, or create new ones.
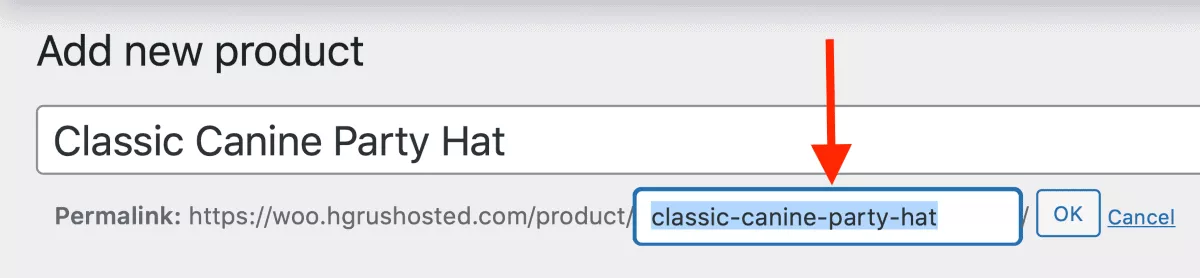
Make sure you edit the permalink for your product too – which is the page URL. It’s generally a good idea to include keywords that also reflect your title.
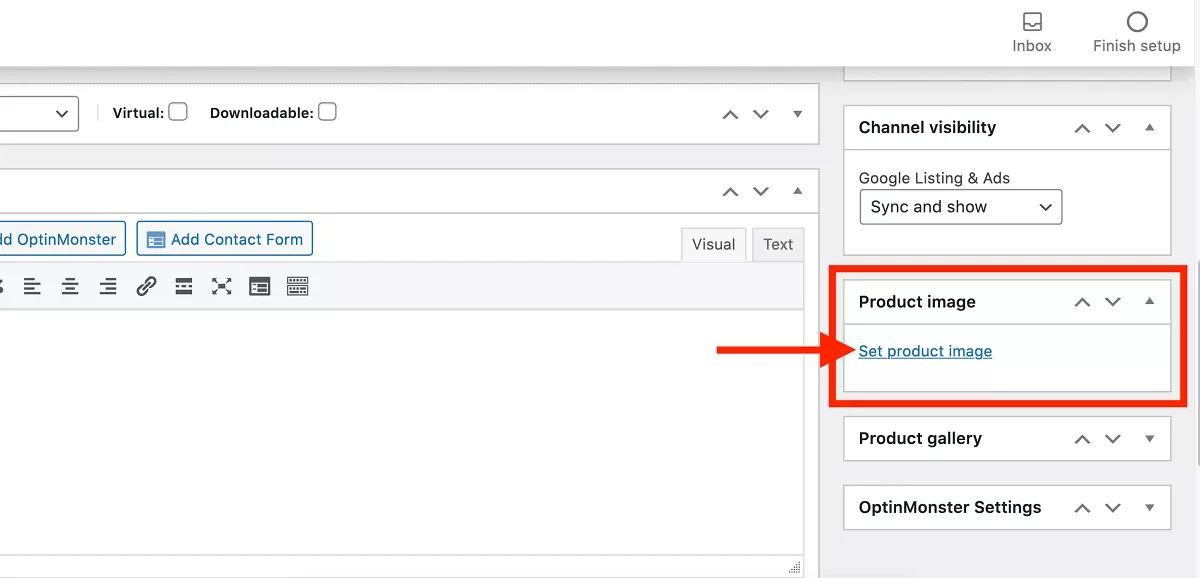
Now, let’s go ahead and add a picture of your product. Product images can make or break your sale – so make sure to use good ones! To add the main image for this product, look for the box that reads ‘Product Image’ and click ‘Set Product Image’.
You can now upload a new image file, add in the necessary ‘alt text’ (which is a very short description of the image) and any captions you want to include. If you want to upload multiple images, you can also create a product image gallery.
Now – let’s scroll down to the ‘Product Data’ box. Here, you’ll be able to set up information such as:
When you’re done filling this in, locate the ‘product short description’ box and fill this in. This should be a shorter version of your product description. It’s usually the first thing people see, so make it catchy and inviting. You want them to click in.
Now’s the fun part – when you’re done refining things, you can click and see a preview of how the page will look on your site. Scroll up to the top right box on the screen and click on ‘Preview’
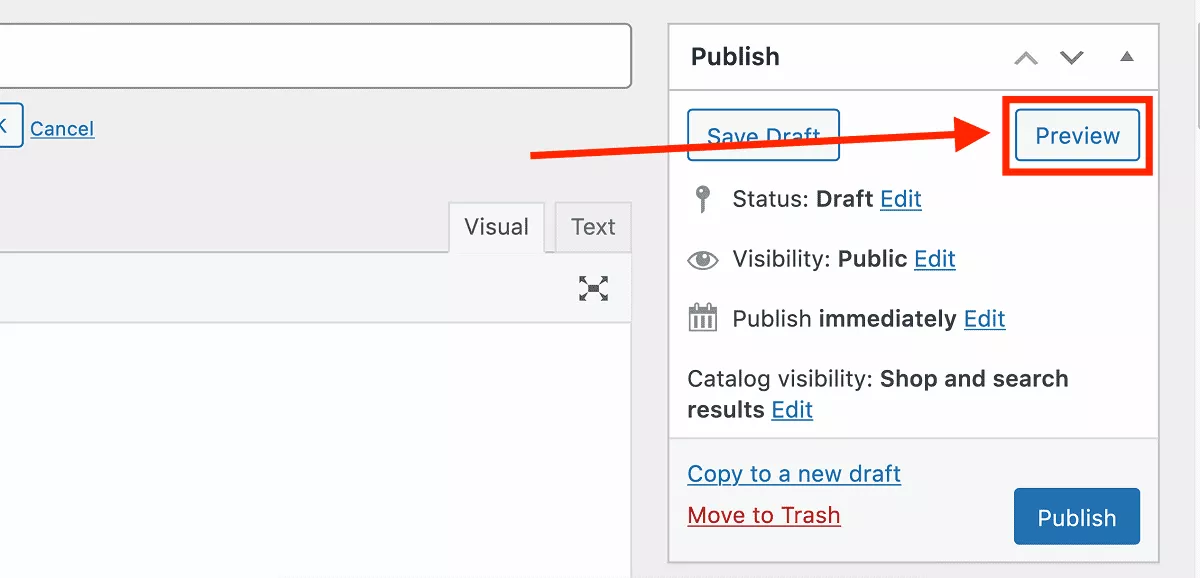
You’ll then be able to see how your product will look on your website, before you push it live.
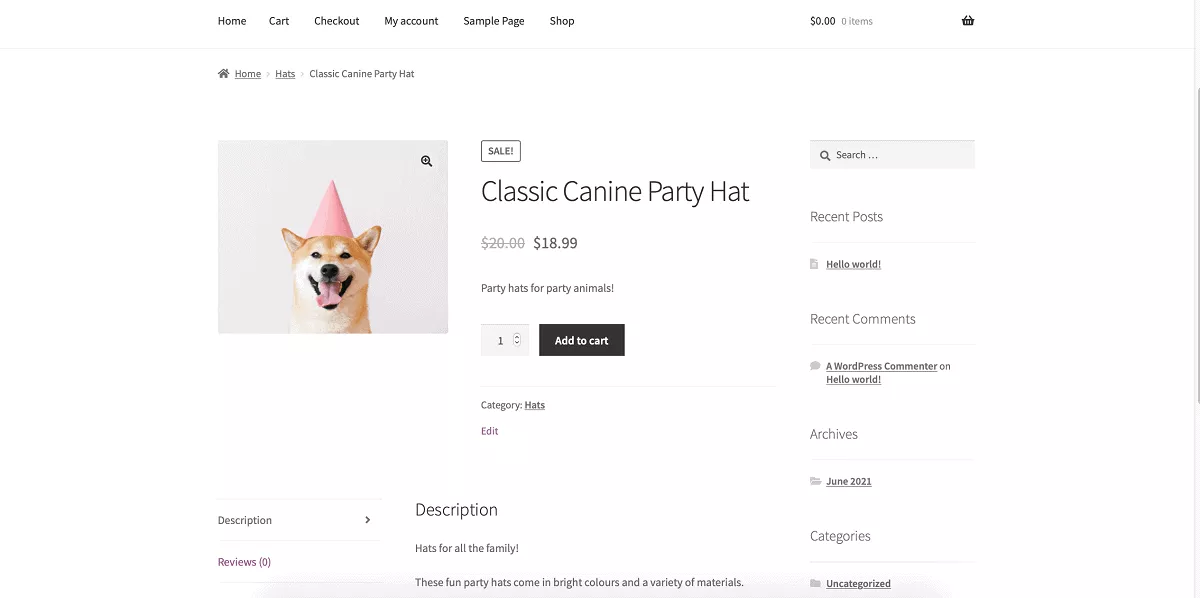
If you’re happy with how it looks, go ahead and publish the product on your store. Simply click ‘Publish’ at the top right of your screen.
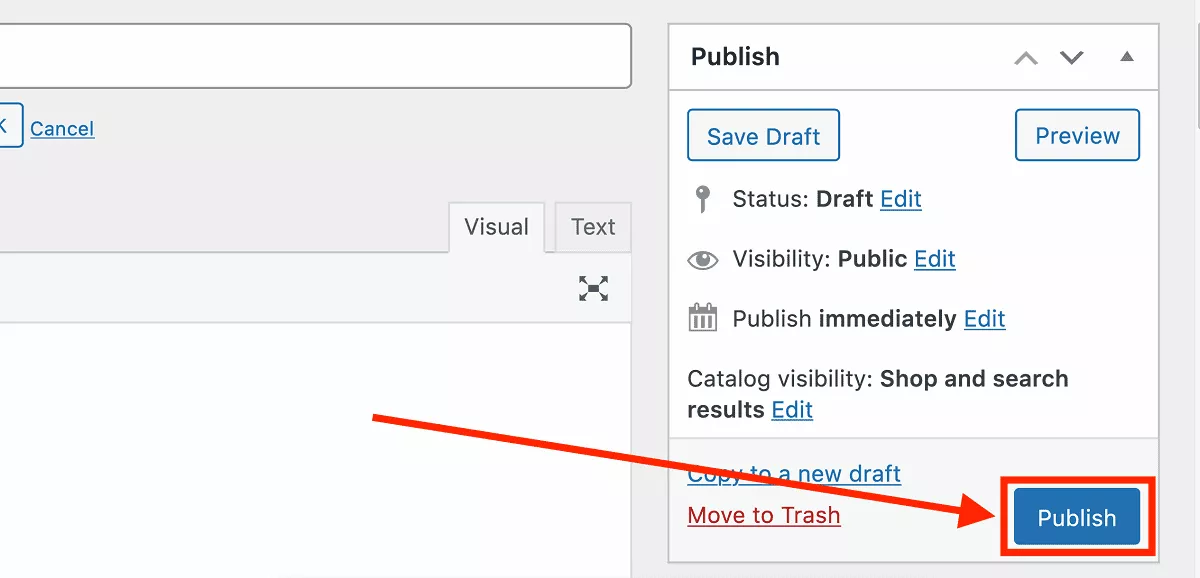
Congratulations – you’ve added a product!
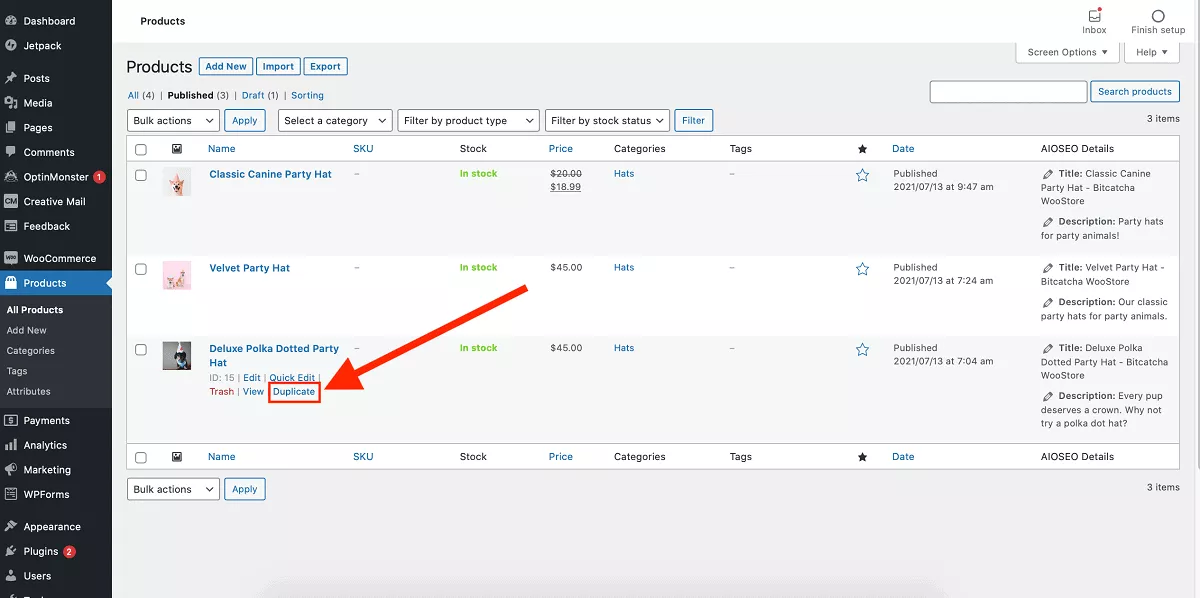
To keep adding products, you can repeat this same process. OR, if you have multiple products that are fairly similar, the quickest thing to do is duplicate a product, and just update the parts that are different. To do this – click on ‘Products’ on the left menu bar to see an overview of all your products. Hover over the name of the product you want to duplicate, then click ‘Duplicate’.
Pro Tip for Larger Inventories
If you’re selling a lot of products, and a lot of different variations of each product, you should definitely familiarise yourself with the ‘Tags’ and ‘Categories’ features too. You’ll find these by clicking ‘Product’ on the left side menu.
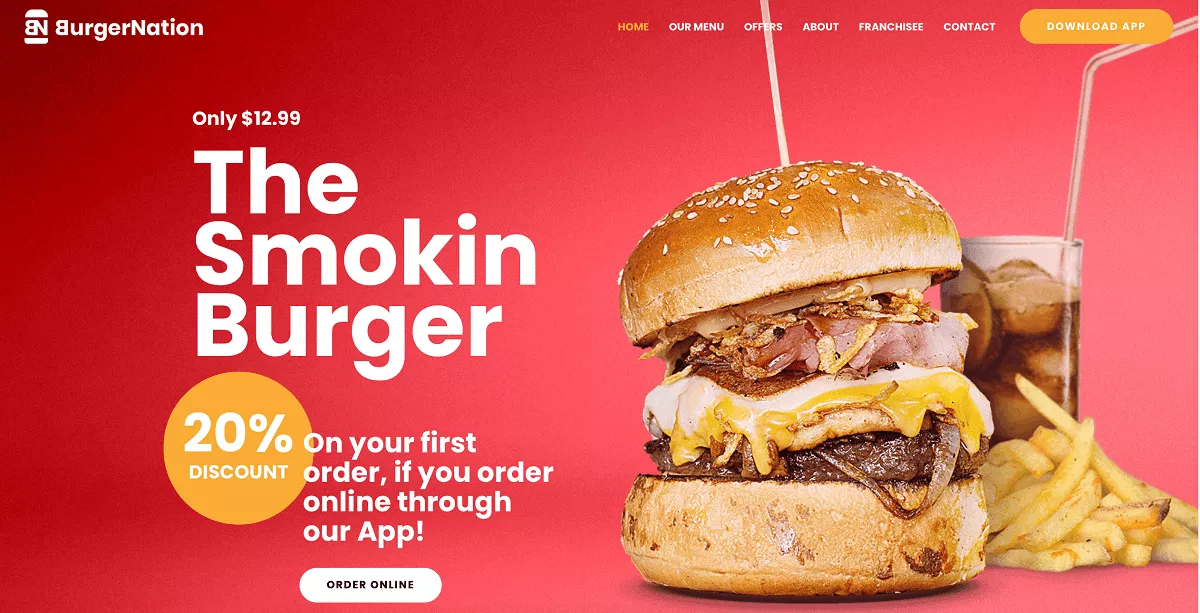
You’re not the first online store, and you definitely won’t be the last. If you want to stand out from the competition, you better make sure your site looks awesome!
Thankfully, there are lots of free and paid themes that make designing your website easy. You can technically use any WordPress theme, but we recommend choosing a theme already optimized for WooCommerce. They will help you display your products in an appealing way to make more sales.
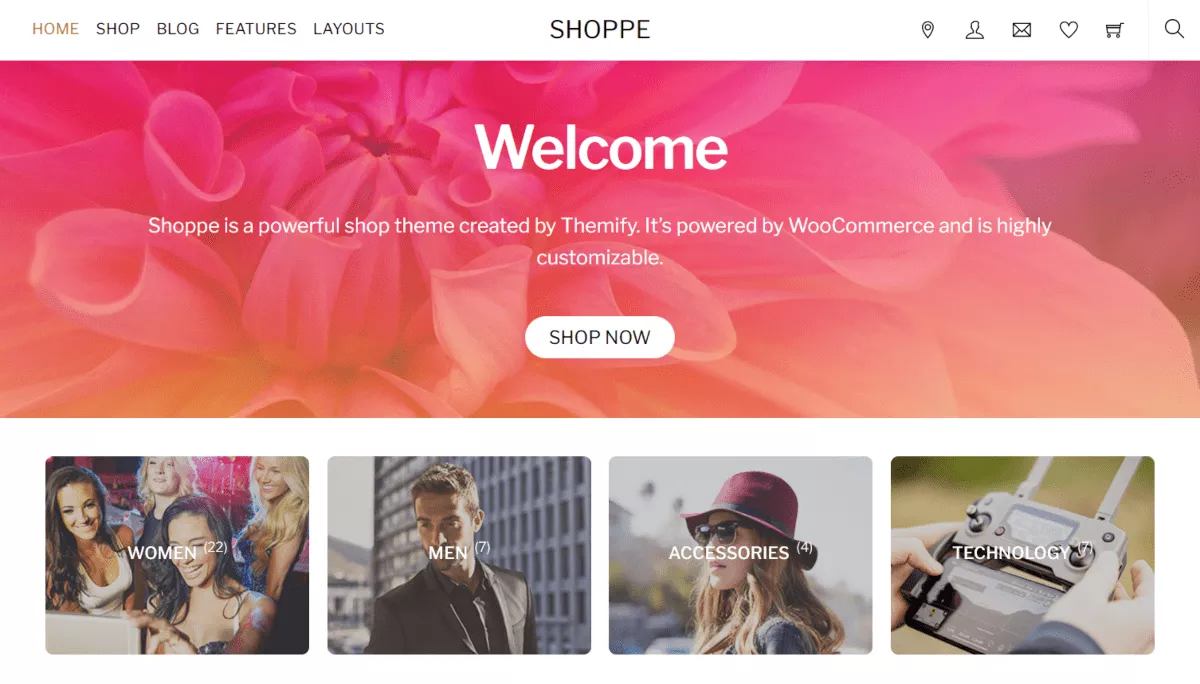
If you’re overwhelmed with the thousands of themes available, look for themes that:
Here are 3 of our favourite WooCommerce themes that you can start with.
Now, let’s go ahead and start customizing the main webpages of your website.
Click ‘Pages’ on the left side menu. You should then see an overview of all the important pages that WooCommerce has generated automatically for you.
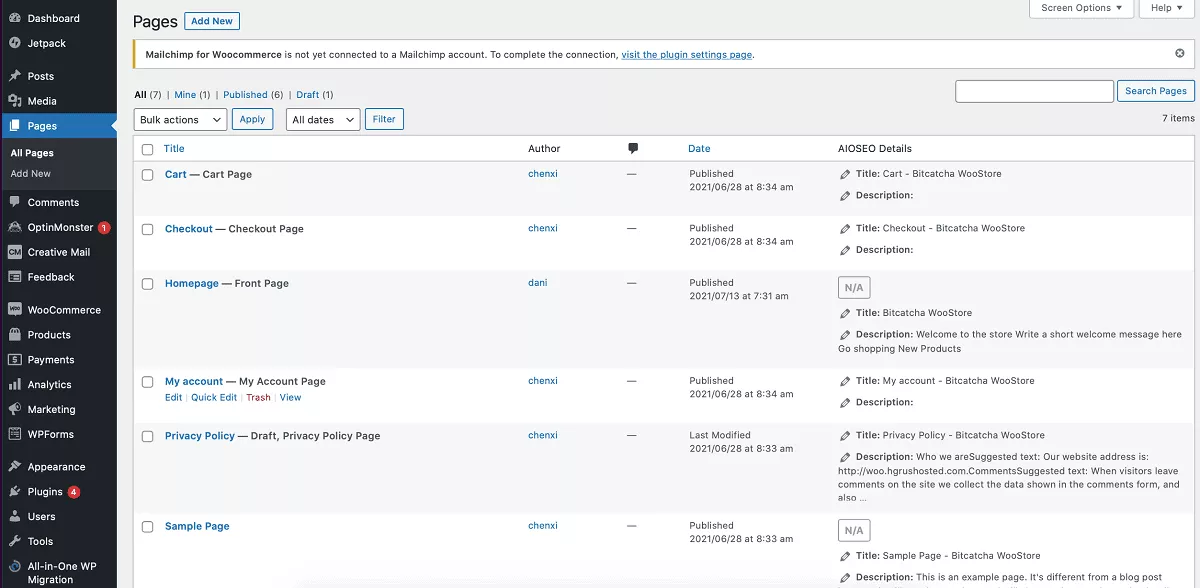
The default pages usually include:
To edit any of them, click on the page name. You can then customize the page using WordPress’s block editor, or by installing a drag-and-drop page building interface such as Elementor.
However – bear in mind that the appearance of many of these pages (like the Cart Page) mostly depends on the theme you’ve picked. You can’t actually customize them much unless you’re familiar with code.
If you click ‘Marketing’ on the left side bar, you’ll be taken to your marketing panel.
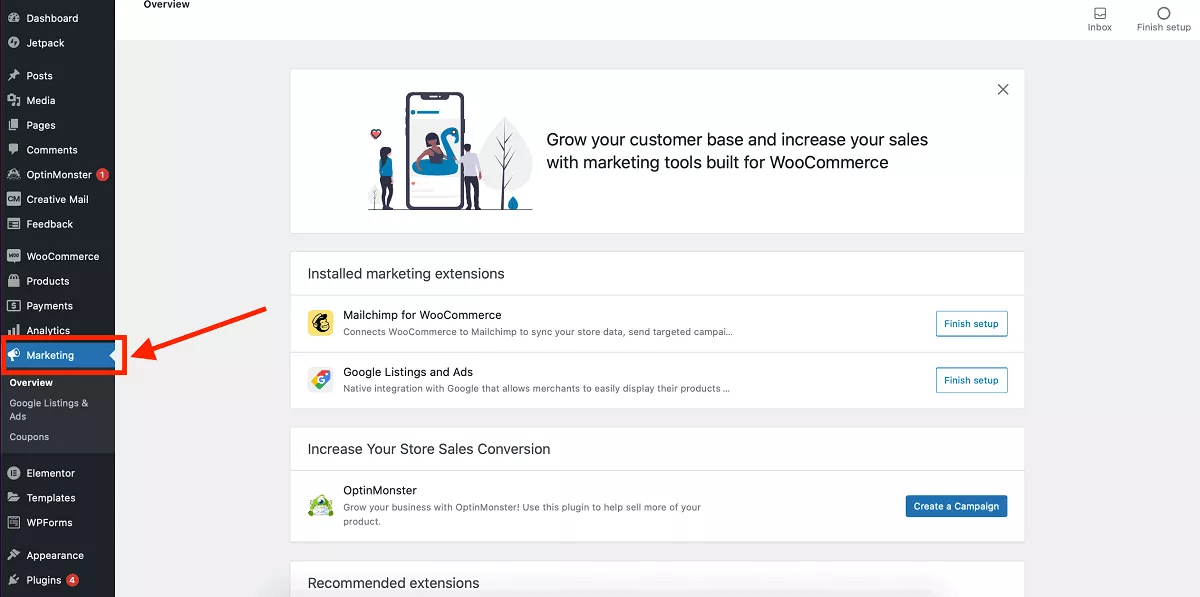
This section is dedicated to tools that can help you grow your website and increase your sales. You’ll be able to see an overview of the marketing-related extensions you currently have, as well as extensions WooCommerce recommends.
To learn more about how to market using WooCommerce, scroll down your dashboard and take a look at their knowledge base.
For the final part of this WooCommerce tutorial, I’m going to explain all the settings that are under the WooCommerce section. This bit here:
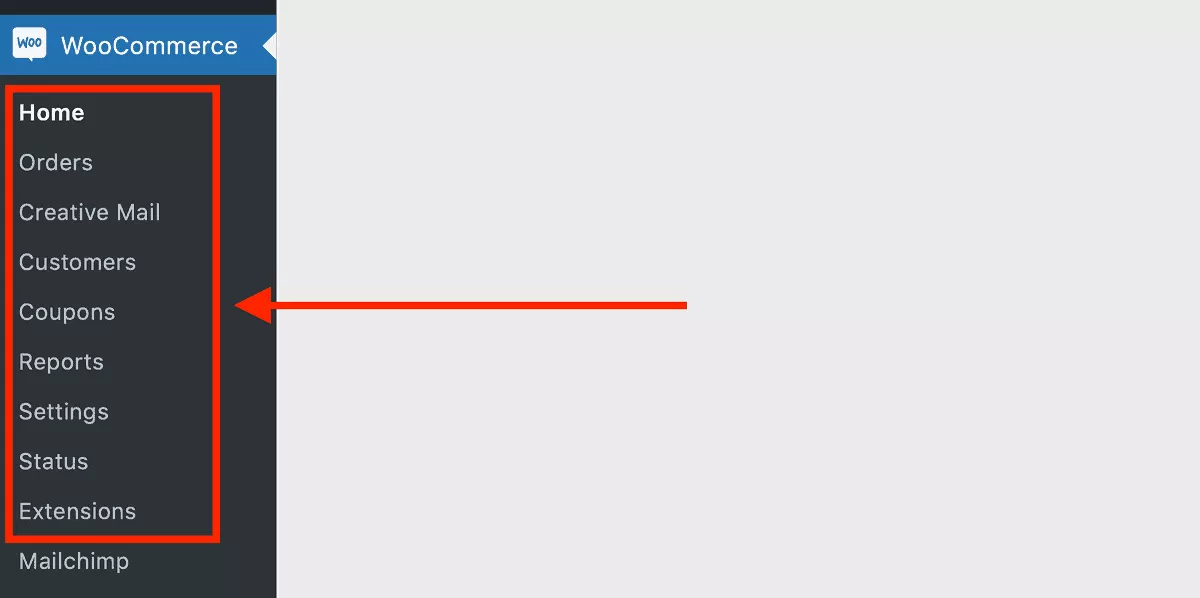
The items on YOUR menu might look a bit different, because it depends what extensions you installed.
Sit tight – I’m going to explain all the important menu items so you know exactly what you have to play with!
This section is where you’ll see all your orders when they start to come in. You can head to WooCommerce’s official explanation for an example of a functioning website.
This dashboard is useful for you to keep track of all your orders at a glance. You’ll be able to see what products are On Hold, Refunded, Pending Payments, etc.
You can then click into your orders to modify orders, update billing/shipping addresses, add notes, process refunds – and more.
This page contains a database of your customers. It will help you keep track of who’s buying, so you can see order values and repeat purchasers. It’s a useful way to understand who’s buying from you.
This is where you can create and manage discount codes.
You’ll be able to determine the type of discount (e.g. ‘free shipping’), and the amount off. You can also set things like coupon expiry dates and any other types of restrictions (e.g. making sure they can’t use them on sales items, or with other coupons).
You can also put a limit on how many coupons can be used.
Here, you’ll find detailed summaries of your shop operation.
Update! There’s a new and improved section available for anyone using WooCommerce 4.0+, and WordPress 5.3+.
Head to the ‘Analytics’ button on the left side menu.
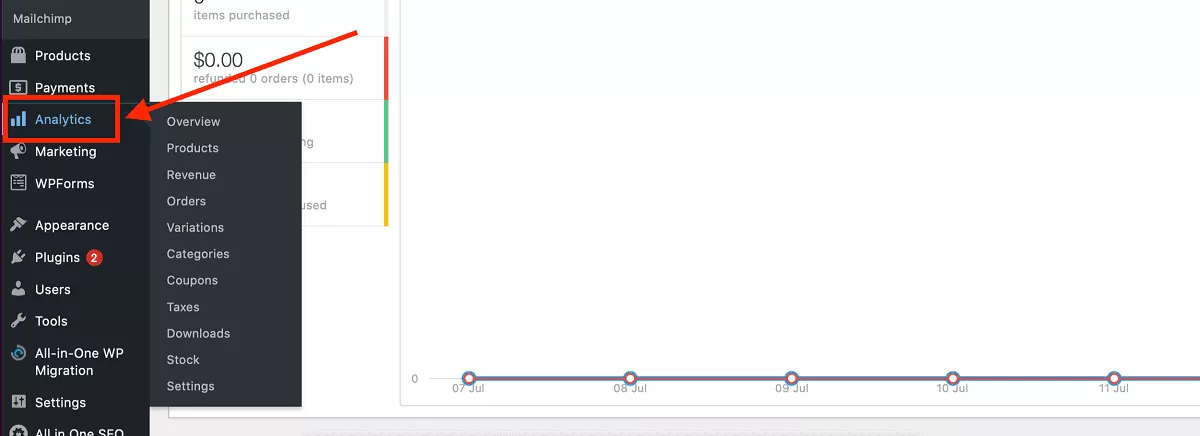
WooCommerce Analytics will help you keep track of a huge range of things. You can start by looking at the Overview page – then clicking through to understand the rest.
This area will help you track your gross and net sales of a certain time frame. You can also filter these by different categories or products, and identify your top best selling products.
Plus, you can review statistics on the number of orders placed, refunded, coupons used, plus find info on taxes and stock.
As a shop owner, you’ll definitely want to revisit this section. For detailed info on how to make sense of Analytics – head to WooCommerce’s guide.
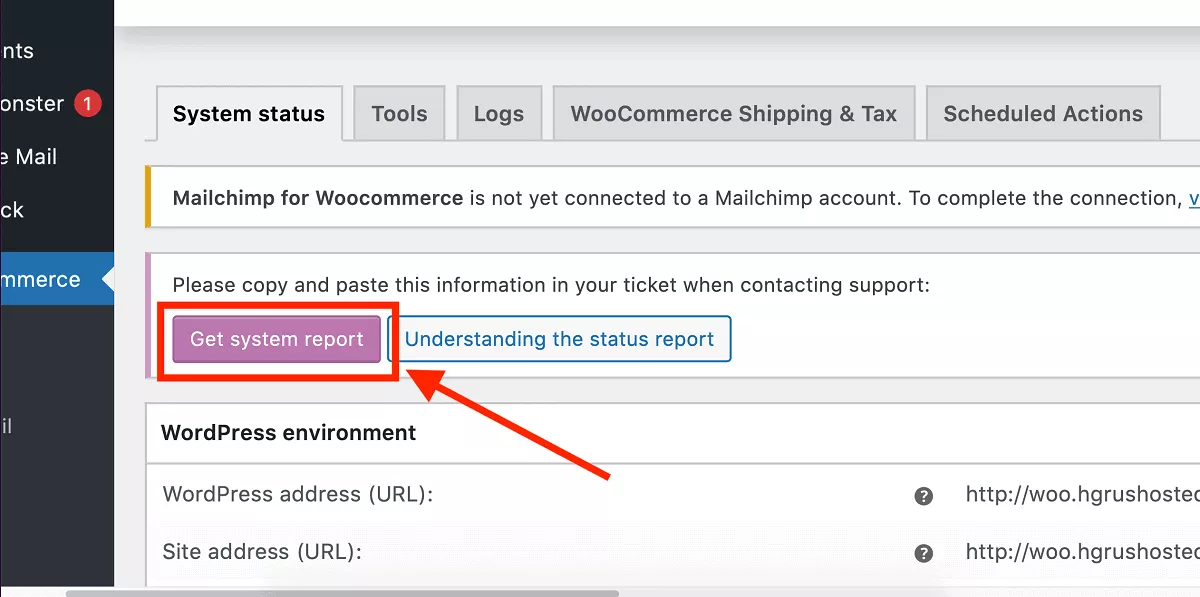
This here is the boiler room – you’ll be able to see an overview of the health and performance of your shop.
Here, you can view information like the versions of WooCommerce that are running, and stats pertaining to your server environment and database. There are also debugging tools, data logs, scheduled actions, and more.
If you’re a beginner, you probably won’t need to be digging around in here too much. However, if you need to contact WooCommerce’s support team in future – they may ask you to generate a ‘system report’ to help them assist your website.
Finally – don’t forget that the world of WooCommerce is massive. They have a HUGE selection of free and paid extensions that you can add to improve your WooCommerce functionality.
This lets you customize your WooCommerce to do everything you want it to do.
If you click into the add-on section, you’ll be taken to WooCommerce’s official shop where you can browse and install extensions.
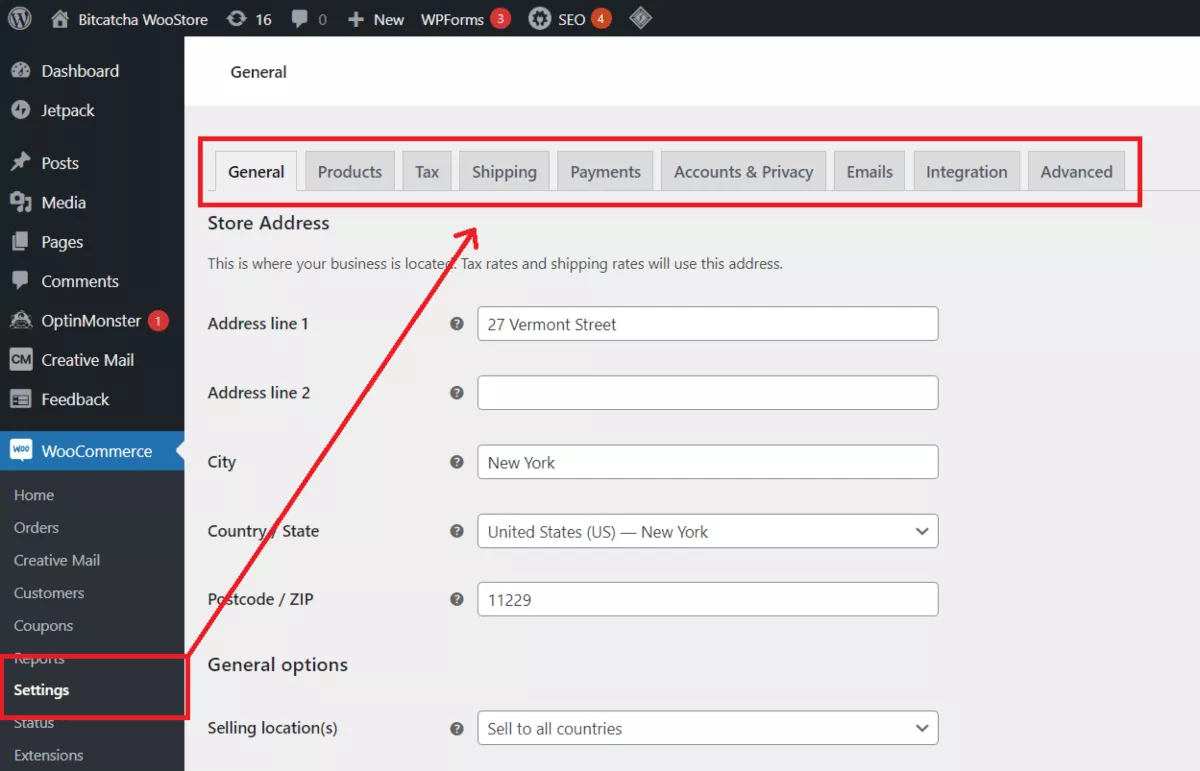
Lastly – the ‘Settings’ area will show you EVERYTHING you can control.
There are LOADS of options here. Most are pretty self-explanatory, so I’m going to just touch on the ones that beginners might be interested in.
Phew – that’s a lot of information!
You’ve now learnt how to set up and configure your WooCommerce shop. You can now confidently customize your theme, add products, manage your payments and run your store!
Plus – you now have a better idea of where everything is.
Give yourself a pat on the back! You’re one leap closer to running a successful eCommerce business.
Make sure you check out the rest of all our content on how to sell online and join our Telegram group if you’d like to meet other business owners and get expert tips!
Dani is an editor and writer based between KL and Mexico City. Sprung from the advertising and travel industries, she’s also spent the last 10+ years freelancing for a slew of creative online businesses around the world. Connect with her via LinkedIn.

