Setting up a Network Attached Storage (NAS) device is very simple. Most NAS brands include installation wizards that will guide you through most basics.
However, configuring it to do the scope of activities may take some time, depending on what you wish to achieve.
Keep in mind that the process and software you encounter will differ depending on the brand (and sometimes, model) of NAS you purchase. However, there are general similarities in the areas which need configuration.
Note
In this guide, I’ll use the Synology DS718+ and its accompanying Operating System, DiskStation Manager (DSM).
Before we jump into the gory details, familiarizing yourself with your Network Attached Storage (NAS) device goes a long way in understanding how it works. Don’t think of your NAS as “additional storage space” but as a standalone computer on your network.
It has all the resources it needs to work independently with minimal intervention from you. The processor handles instructions, controllers interact with hard drives, and memory provides fast working space for everything.
That’s all inside the NAS, though. Let’s take a closer look at the outside:
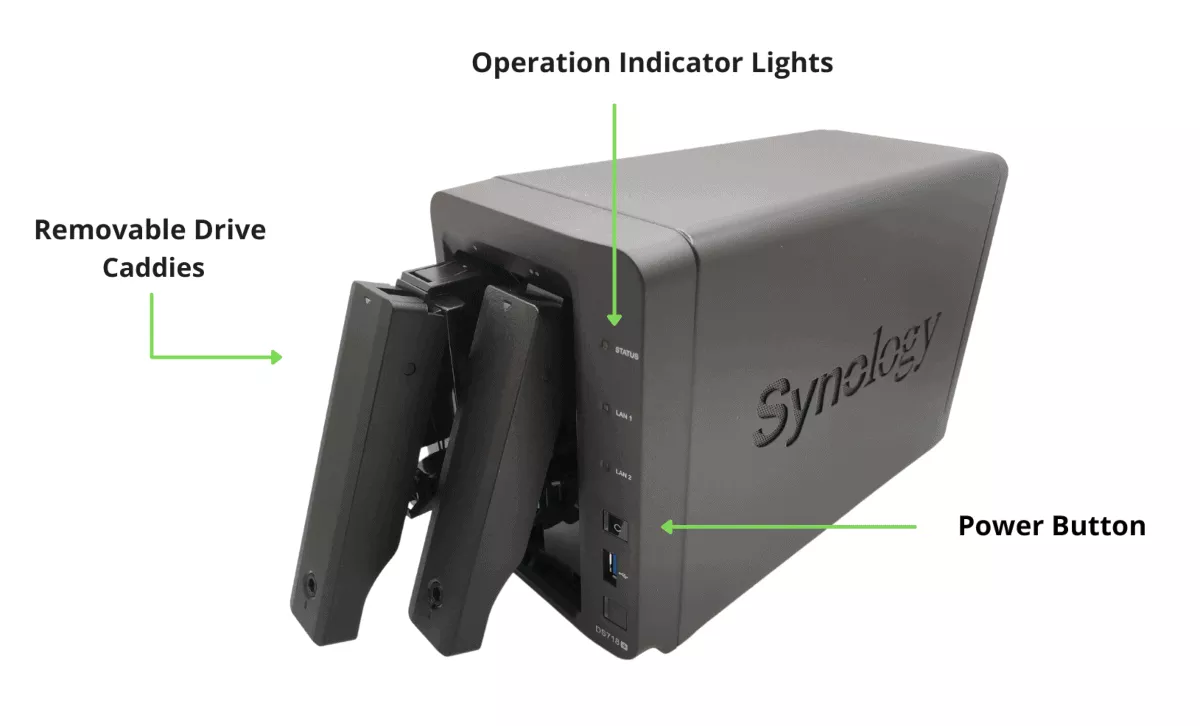
Most NAS drives offer very basic physical interactivity. They are meant to be set up once and left alone to run the rest of the time. It is common to mount hard drives via the front panel of the NAS – this design allows for easier access.
Important Tips
Check out our research on the best NAS hard drives on the market.
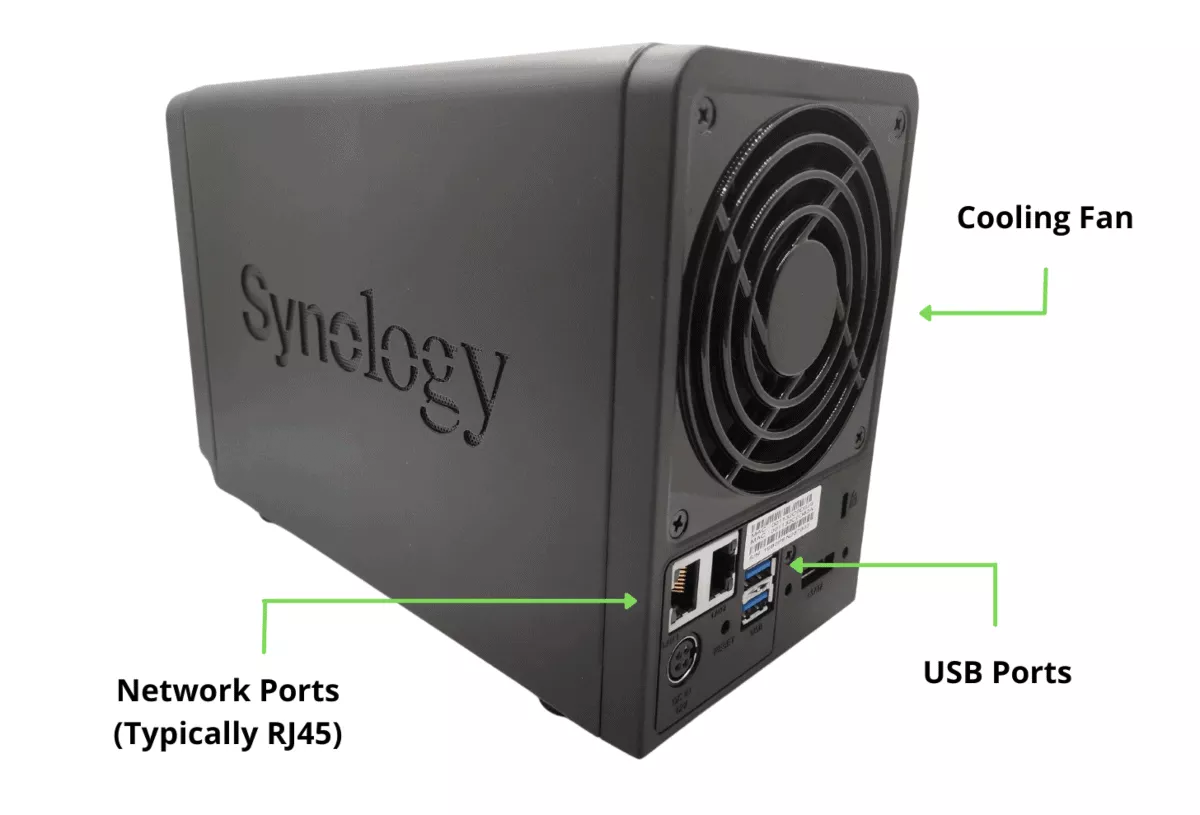
The magnetic platters located in hard drives spin rapidly when in operation. Doing so generates heat, which isn’t ideal for long operational life. The small confines of NAS enclosures compound this, so many NAS manufacturers often include a cooling solution such as a fan.
All NAS units will also come with an array of ports. The main port of interest will be the network port used to link the NAS with Local Area Networks (LAN). Some NAS drives may have more than one network port.
Most NAS devices will also offer some USB ports that you can use to mount external drives directly to the NAS.
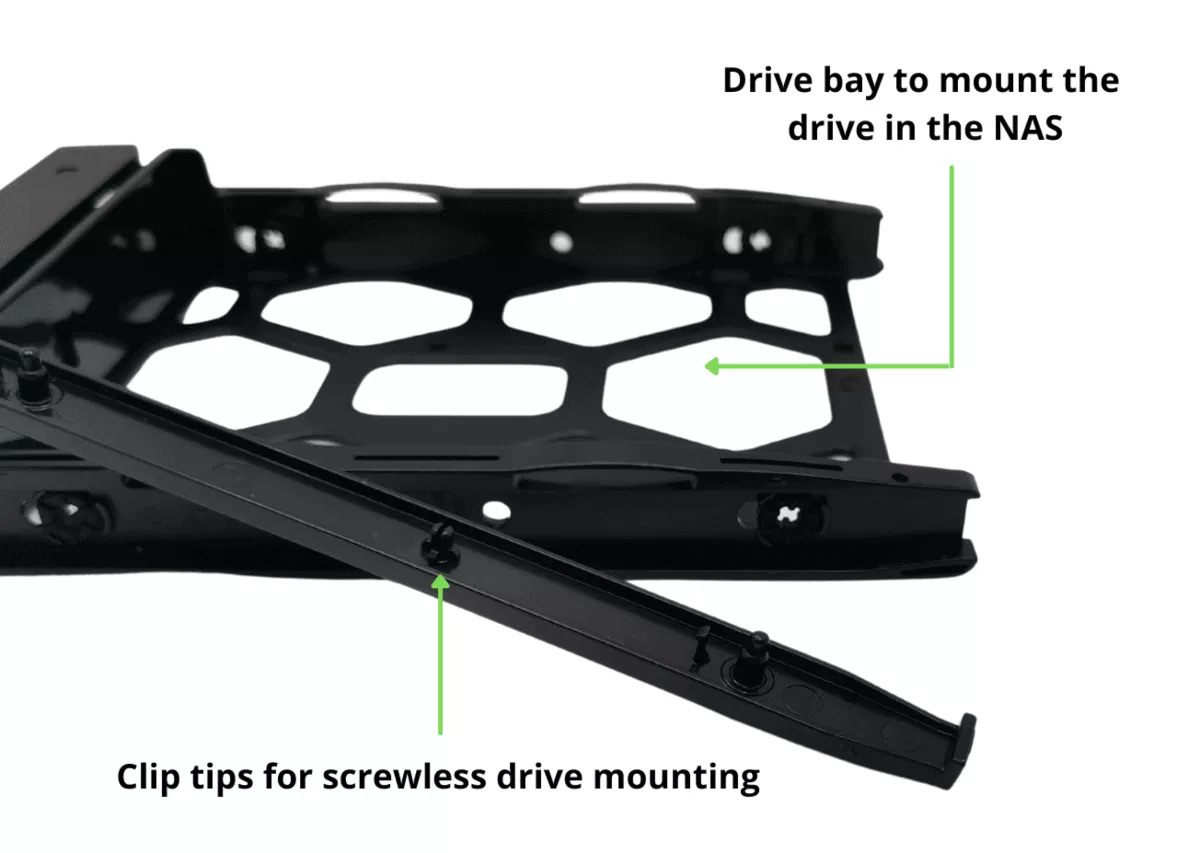
Most NAS units also come with drive caddies. These are enclosures you mount hard drives directly on before sliding them into the drive bays. Drive caddies help guide your hard drives into precise mounting points to avoid improper installation and also help dampen vibrations from the drives during operation.
Installing the drives into your NAS is usually a 2-step process.
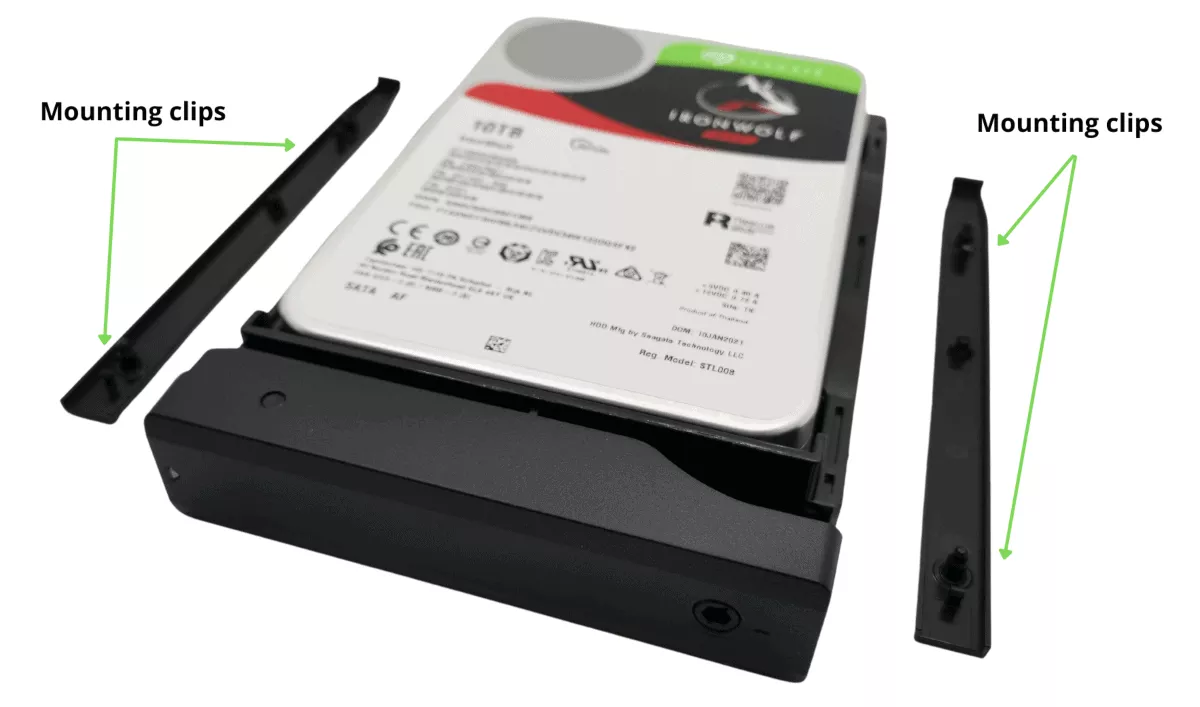
First, mount your hard drive onto the drive caddy. Some brands, such as Synology, offer a screwless mounting system. Place your hard drive into the drive caddy before clipping or screwing the drive rails directly onto the hard drive over the mounting points on each side of the drive caddy.
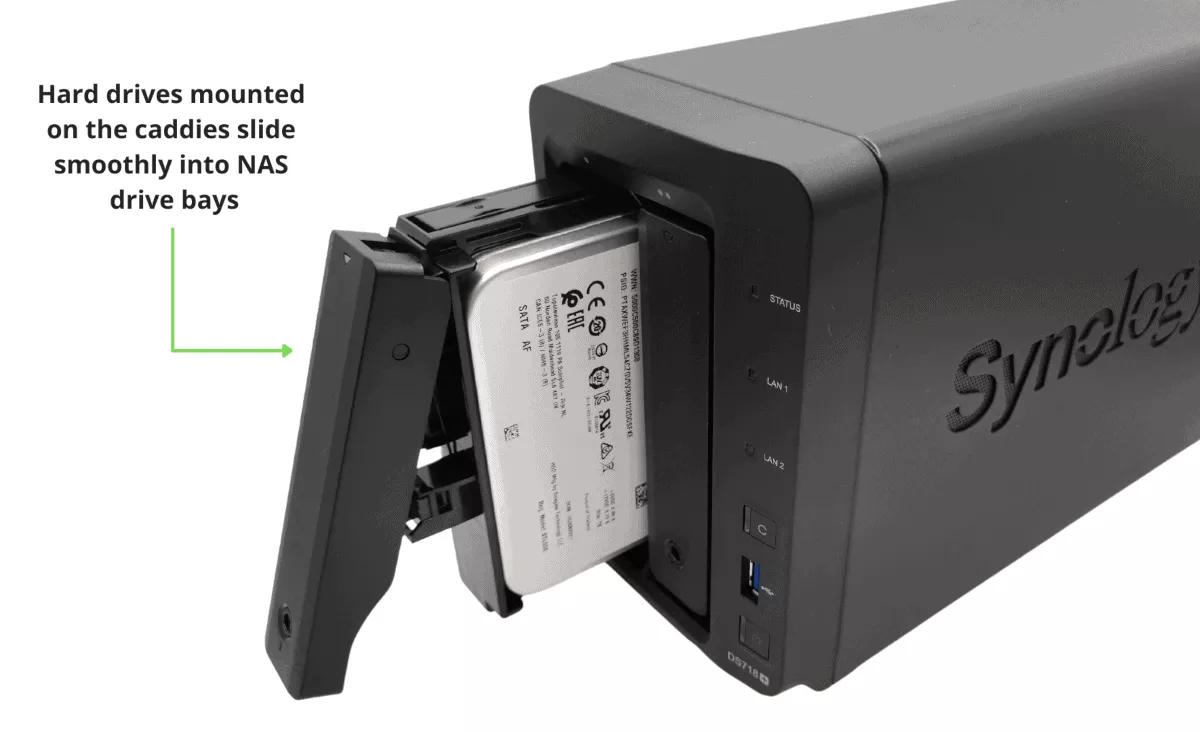
With the hard drive mounted in the caddy, slide the caddy into the NAS drive bay. Inserting the drive should be a smooth process, with very slight resistance towards the end as the drive clips onto the data and power ports inside the NAS unit.
Never force a drive caddy into the NAS. If you encounter strong resistance, you are likely attempting to mount it incorrectly. If so, remove the caddy and try to re-insert it. With the drive mounted, you can then attach the power brick and LAN cable.
You can place your NAS in any location, but preferably somewhere cooler. Ensure that any air intake ports or fan vents are free from obstruction. I find that the best place is simply somewhere near the switch or router. Many NAS hard drives are relatively loud, so avoid keeping your NAS near your work area.
Keep in mind that you should limit the distance between the NAS and any point of connection. Different LAN cables support varying maximum data transfer distances. The most likely cable you will be using will be a CAT6, which allows a maximum of 100 meters (328 feet).
Important Tips
Signal quality degrades over longer distances. Running LAN cables to extreme lengths isn’t a good idea, so even if the maximum is 100 meters, try to keep them as short as possible.
Again, keep in mind that I’m using the Synology DS718+ for this guide. There are many other great NAS brands and models to choose from, but the general concept should be the same. To start, hit the power button on the NAS drive.
Don’t be alarmed if you hear a lot of whirring, beeps, or flashing lights. The NAS is merely getting familiarized with everything that’s attached to it.
Hitting the power button will only turn the NAS on – you need to start the configuration wizard manually.
Some brands like Asustor and TerraMaster will require that you download a setup file for their software for the setup process. Synology and QNAP have a setup process that you can launch from the web browser.
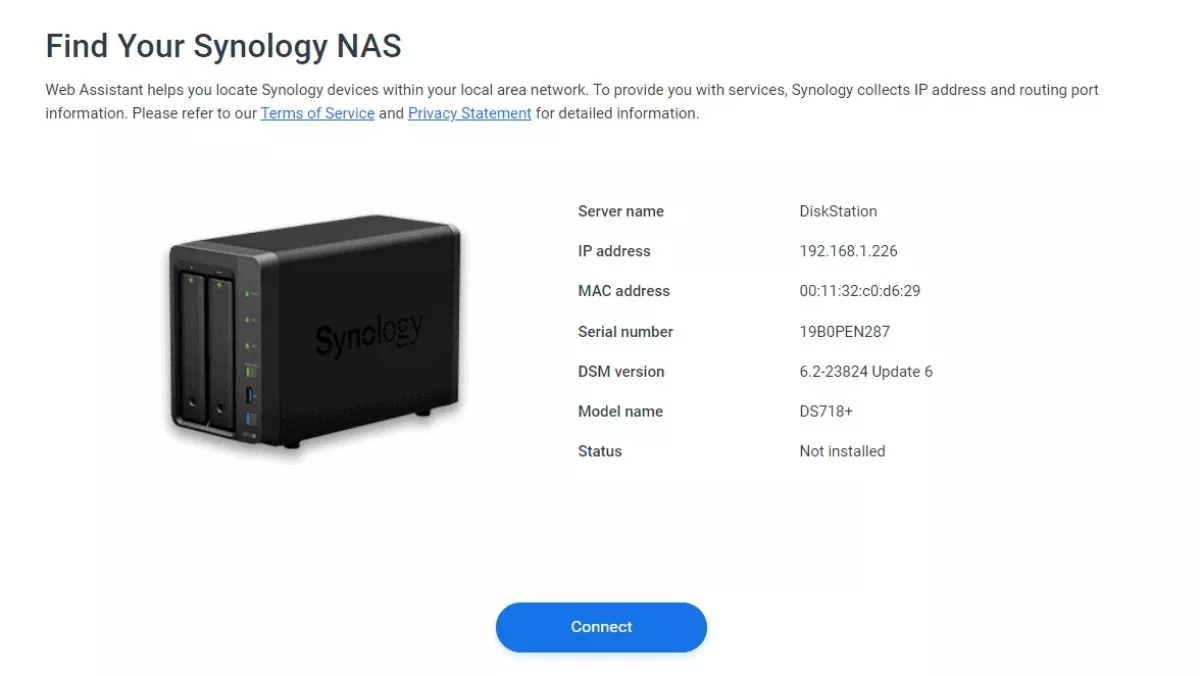
To begin my Synology NAS configuration, I typed “find.synology.com” into my browser address bar. Entering the URL scans the local network and detects the DS718+ connected to my router. Once you see this, hit the “Connect” button.
The wizard will prompt you for more information to create an administrator account for the NAS. You will also have the option to connect with a Synology account. I highly recommend you create one as it will offer more convenience when connecting to the NAS.
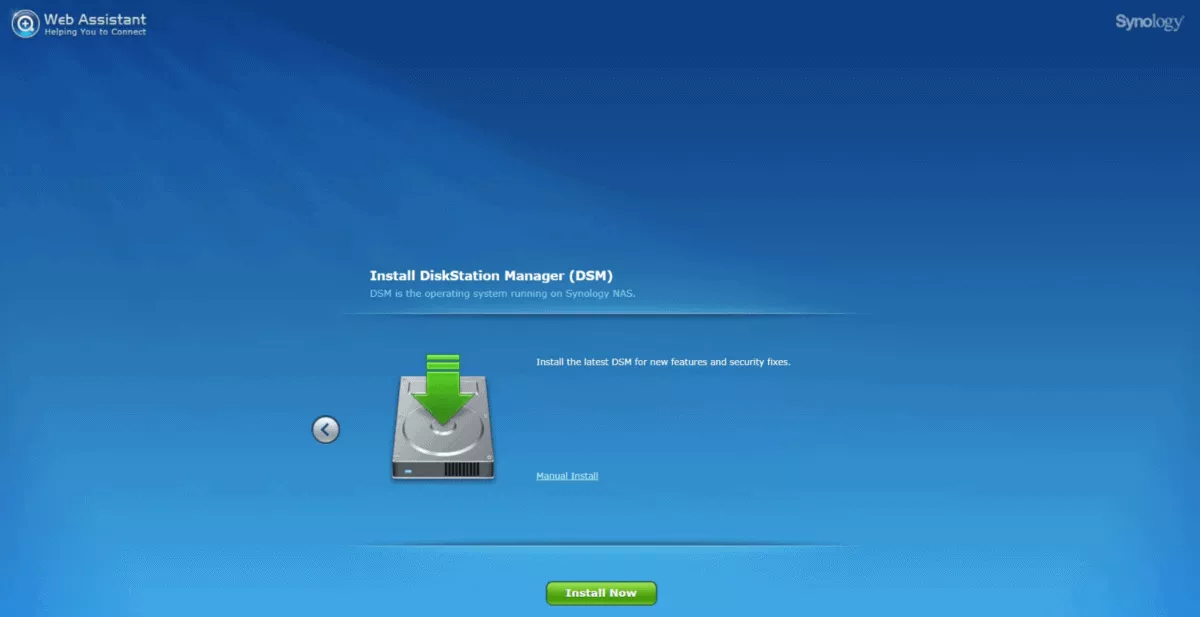
Synology’s DSM is like any other application or OS and needs updates or patches. When running the setup, you will need to check for updates and install all the latest ones. Hit the “Install Now” button to continue.
You will see a progress indicator once the process begins. It takes approximately ten minutes or so. When the updates are complete, the NAS will reboot and bring you to the main interface for DSM, the control center for your NAS.
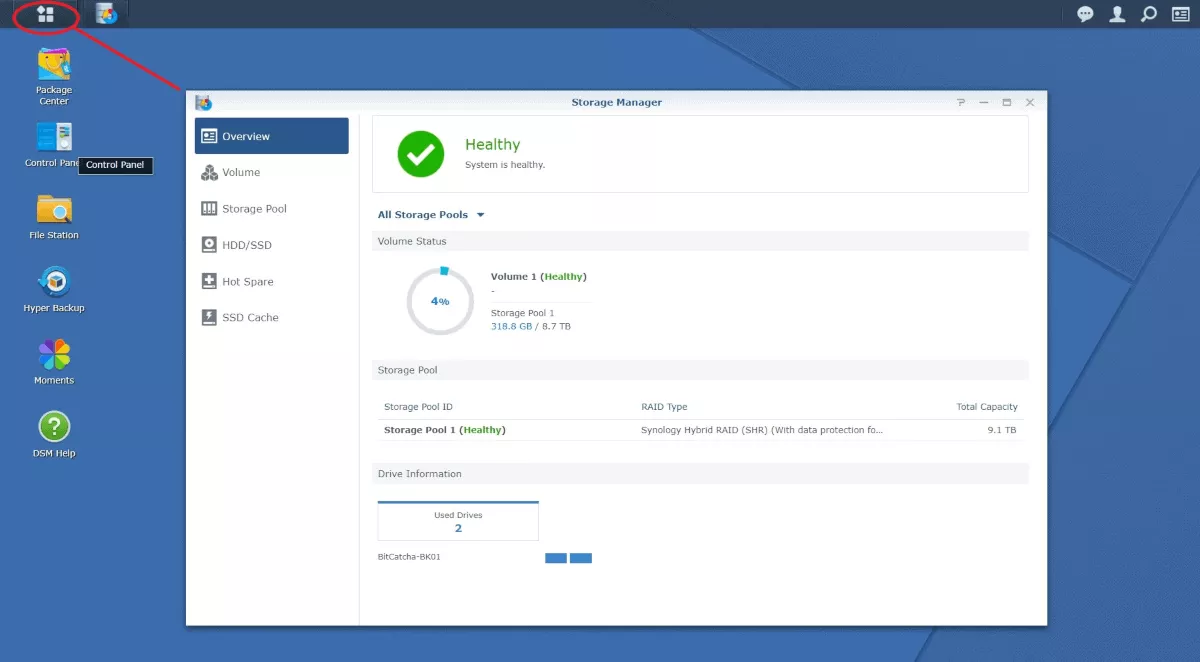
Although you’re in the DSM interface, your setup is not yet complete. Your Synology NAS needs to work with a familiar file system for the hard drives you inserted earlier. Click on the Main Menu icon on the top left of the screen and launch the “Storage Manager.”
The Storage Manager will scan the system to see if a familiar configuration is detected. If not, it will automatically launch the configuration Wizard. The most important part of this step is the selection of the RAID type.
RAID, or Redundant Array of Independent Disks, is how multiple drives can work together in various forms. The type of RAID chosen will affect overall storage capacity, performance, and reliability.
For Synology NAS, I recommend you use Synology Hybrid Raid (SHR). This form of RAID offers a good balance of characteristics. It uses one drive as “Parity”, which is the security against hard drive failure in your NAS. SHR then combines the remaining drives for storage space.
To illustrate this, let’s consider a 3-drive SHR RAID configuration with each drive being 8TB in capacity. Taking away one drive for parity, the available storage area will be 8TB + 8TB, for a total of 16TB.
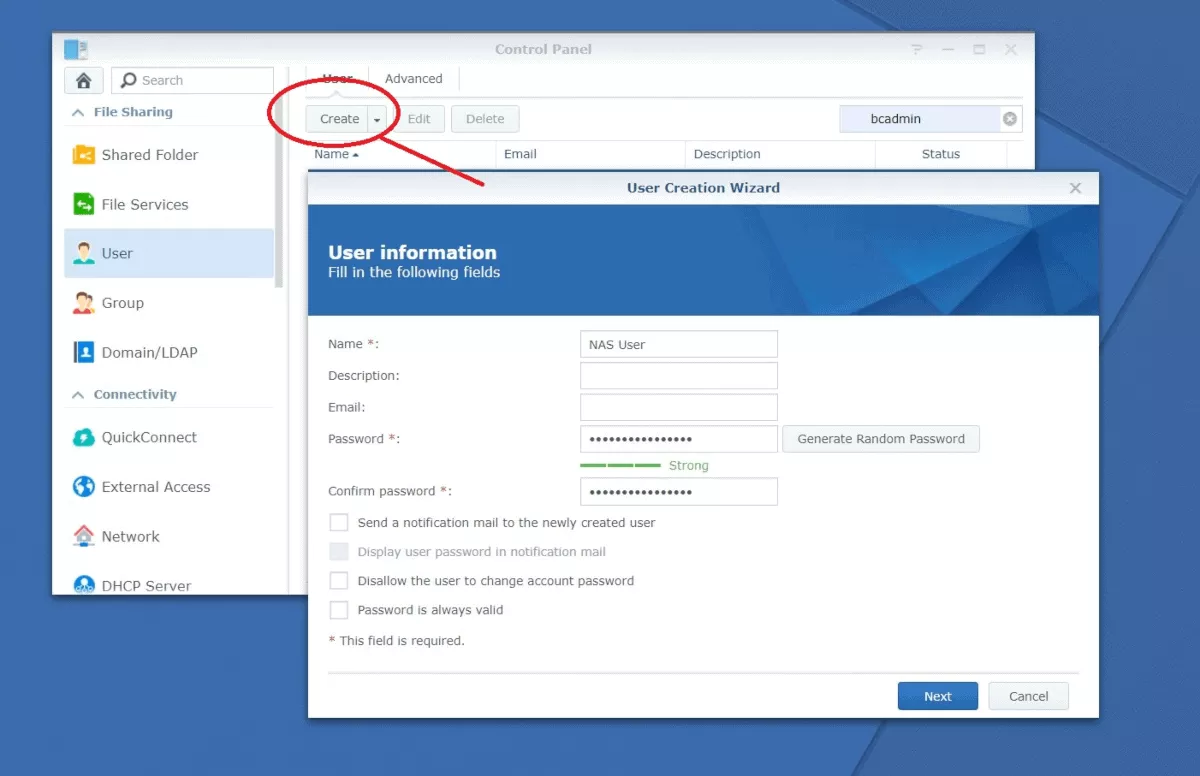
The account you created when setting up the NAS is an administrator account. I highly recommend that you create separate user accounts for each person who will access the NAS. To do this, open the Main Menu and launch the Control Center.
On the Control Center, click “Create,” and you can fill in the information for the account. Repeat this process for as many users as you require.
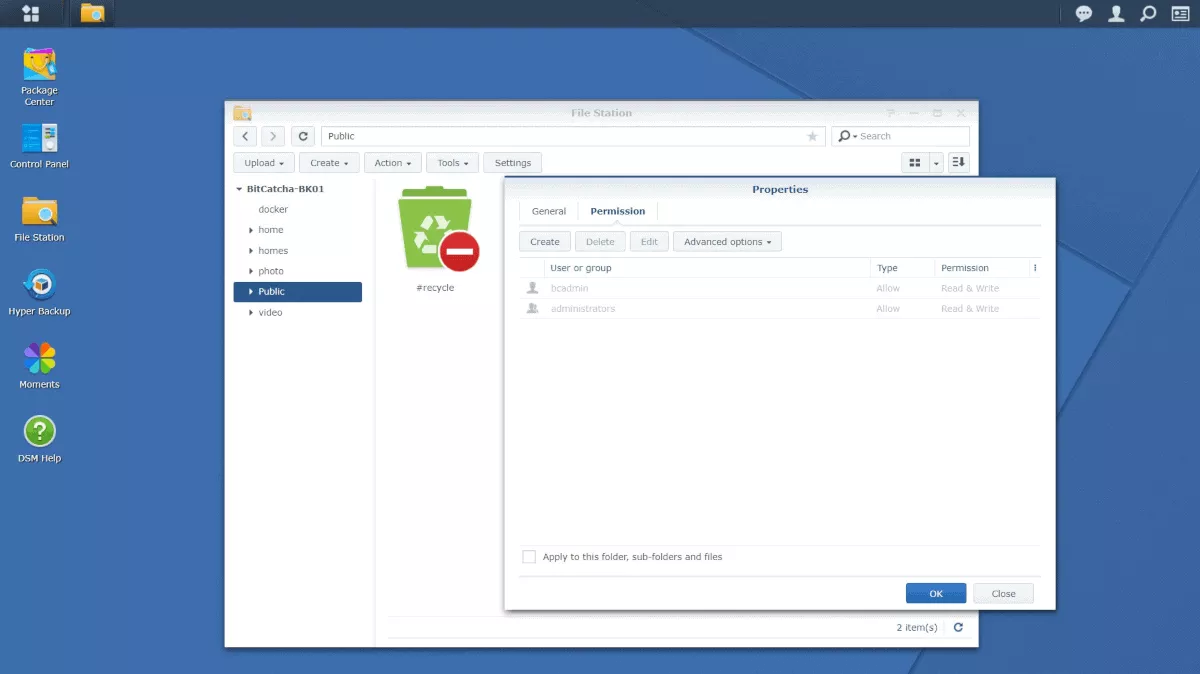
With the drives initialized and ready to use, you can then create folders for users to access.
How you set up your folders may vary depending on your needs. You can build one public folder for everyone to access or silo your data, with each user getting their own private space.
Folders in your Synology NAS are managed similarly to those on Microsoft Windows. To manage your folders, open the Main Menu and click on “File Station.” Here you can create or remove folders and select the access permissions for each.
With the folders and users created, your NAS is now ready for regular use.
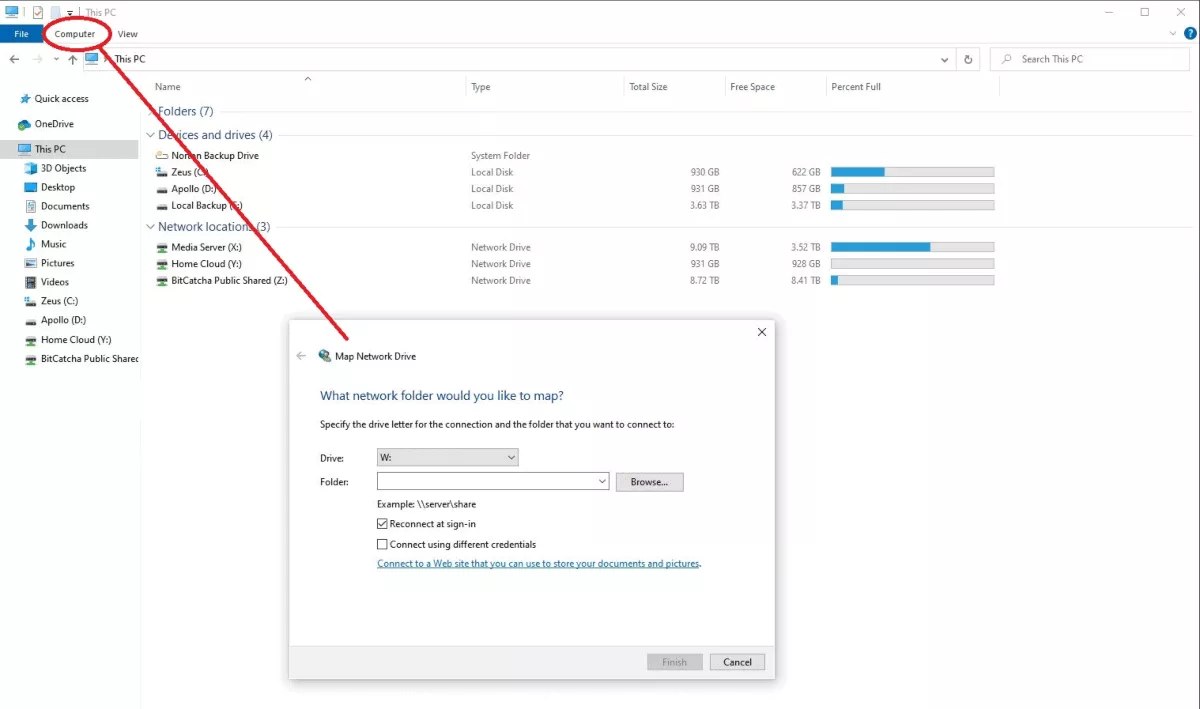
For convenience, it’s best to map the folders in your NAS to your device. On your device, open File Explorer. On the top taskbar, select “Computer,” then click on “Map Network Drive.”
Click on “Browse,” and you’ll be able to traverse your network to the desired folder to be mapped. Select the folder on your NAS, then click “OK.” With this, each time your device boots, it will automatically connect to that folder on the NAS.
Synology DSM includes a “Package Center,” something like a Package Manager in Linux or the Microsoft Store on Windows. Here you can find applications that can extend functionality on your NAS past simple storage.
Some of the apps you should seriously consider installing:
Getting your network attached storage up and running with the basic operational features isn’t difficult. As you can see, it works the same way as most other modern devices. You may need some slight familiarity with networking at best, but even that isn’t necessary.
This guide only shows the basics of getting everything to work but many more things the NAS can do. I suggest you take the time to explore your NAS when first setting it up since you can easily undo things without risking any stored data.