We’ve poured our expertise into this simple 6-step guide on how to start a blog. Follow along to learn how to set up your own blog with the best tried-and-tested tools out there for bloggers.
Want to build something meaningful? Or work on your own terms? Well – why not be a blogger?
If this page has found you, you’re probably not sure how to start a blog. You may even be pretty confused where to begin. Well, you’re in luck.
We at Bitcatcha have been writing our hearts out since 2014, with our online content attracting millions of readers each year. We’ve also spent thousands of hours geeking out about the tech behind successful websites, so we’re pretty darn passionate about the topic.
How To Start A Blog – From Zero To First Blog Post In 6 Steps
Bonus: Resources to Help You Write Compelling Content
Wrap Up
Frequently Asked Questions
This beginner’s guide is perfect for anyone who wants to start a blog quickly, but on a strong and sturdy foundation. Follow along and you’ll exit this article with a new blog that’s primed for success and ready to face the world.
Believe it or not, starting a blog can be quite straightforward. For the parts that DO require technical know-how, we’ll share our own tried-and-tested recommendations and will guide you through each step.
In a second, I’m going to outline exactly what you need to do to start a blog. However, I want to quickly touch on WHY you should build a blog.
Note
If you already have your why, you can skip ahead to step #1.
When blogging first became a thing, most people used it as an online journal to pen down their thoughts. Since then, the blogosphere has evolved and spawned blogs of every shape and size.
Generally speaking though, blogs are still a type of website with a focus on written content.
People have many motivations to start their own blogs. Some find it cathartic to express themselves. Some are just plain passionate about their chosen niche.
I can’t speak for all of them, but one motivator that draws most people to the beautiful world of blogging is the ability to make money from their blogs.
Because bloggers write from their personal experience, they often share a very personal connection with their readers. This means that many high profile brands are willing to pay a blogger to endorse their product.
However, here’s a lot of confusing advice and mythology about making money from your blog. One of the best pieces of advice we can give you, blogging padawan, is to be realistic and patient.
Another important way that new bloggers can inspire themselves is to browse other successful blogs. You can start by skimming through our masterlist of 43 blog examples that are doing things right – it’s a great reminder of what’s possible with the power of blogging!
Note
Many people have the misconception that you need to be a good writer to start a blog. While having good writing skills can help communicate your message, it’s the content of your blog that sells. Check out our guide to blogging even if writing isn’t your thing.
Regardless of what motivations you have to start your blog, the bottom line is that blogging can be deeply rewarding.
Now that you’re absolutely convinced that it’s time to start a blog, let’s get into the steps of how to build your own.
Pick a blog niche that interests you and some sort of audience.
>> Skip ahead to Step #2: Brainstorm A Blog Name
This exciting first step to starting a blog will shape the way you blog for the rest of your blogging career. It’s a simple but very important step: You have to decide on your niche.
In short – what do you want to blog about?
Are you going to be a tech blogger? A digital marketing blogger? Maybe you’re into sustainable living. Maybe food is your jam.
Your chosen niche will help forge a path for your blogging topics in the future.
When you’re deciding on your niche, there are 2 important questions to ask yourself:
The first question is something that only you can answer.
The second question is something that you can help validate through good ‘ol fashioned research. Check if people are searching for these topics. You should also take a look at the competitor blogs that already exist in that niche.
The niche that you select will also determine how much potential you have to monetize your blog in the future.
You don’t HAVE to pick a niche that’s already popular, but it can really help to see what types of blogs are successfully earning.
To help you out, we’ve written a piece on the 13 most popular types of blogs that we’re seeing again and again. Go check it out if you want some insights on the different monetization strategies that are common in different niches.
Once you’ve picked your niche, it’s time to start thinking names.
Choose a short and memorable name for your blog.
>> Skip ahead to Step #3: Choose A Blogging Platform
Your next step is to choose a name for your blog.
Your blog name is the first impression that readers will have of your blog. So it should be short, unique and memorable. You want people to remember you, right?
Choosing the right name for your blog is very important, so give this step ample time and thought.
A useful tool that many people use is a blog name generator tool like Name Mesh to help you find blog name ideas that can be turned into a functioning domain name.
We’ve actually written up a great article explaining what’s a good blog name and how to use a blog name generator cleverly. Even if you already have a blog name in mind, you might find our final checklist in tha article useful.
When you’ve got your unique blog name, you’ll need to choose where to build your blog.
Choose a platform to manage and build your blog. We recommend WordPress.org (self-hosted WordPress).
>> Skip ahead to Step #4: Get a Domain Name & Web Hosting
Now, it’s time to choose the management platform that you’ll use for your blog.
This is an absolutely critical step, as your choice of platform will affect every aspect of your finished blog, such as how it looks, how well it functions, how easy it is for you to customize – and more!
There are lots of blogging platforms out there. You’ve probably heard of the most popular ones, such as self-hosted WordPress, Medium, and Wix. They all have their pros and cons, so it can get kind of overwhelming.
Many new bloggers make the mistake of going for a free hosted blog platform such as Tumblr or Blogger. The word ‘free’ may sound tempting, but there’s a big catch: free hosted blog platforms come with a LOT of creative and technical limitations.
If you’re serious about starting a blog and want to give it the best chance of success, you should definitely go for WordPress.
After our own research, testing, and direct experience – we can confidently say that the best platform for most bloggers is WordPress.
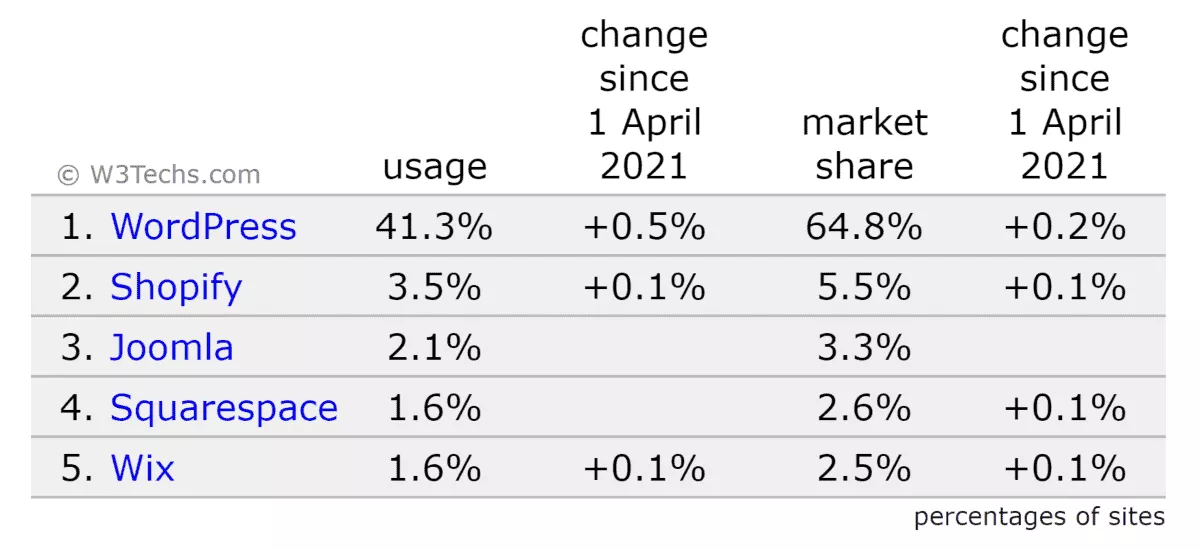
Why? Simply because WordPress is one of the most powerful blogging platforms out there. It powers a whopping 41.0% of websites on the internet today.
In fact, this is the option we used when we set up Bitcatcha.com in 2014. And we’ve never looked back.
WordPress is SEO friendly, very easy to use and offers thousands of plugins, which brings extra functionality to the table without needing too much technical knowledge.
Just be careful not to get confused between the 2 different forms of WordPress:
It may be tempting to get your free web hosting and domain name directly from WordPress.com, but as my dear grandmother used to say, “good things don’t come cheap, cheap things don’t come good”.
WordPress.com is phenomenal, but their free web hosting and domain name unfortunately just comes with too many limitations.
These are just a few of the problems we can think of.
By going with WordPress.org instead, and purchasing your blog domain name and web hosting separately, you won’t run into any of these issues.
Note
When doing our research for this guide, we noticed that many people were stuck trying to decide between Wix vs WordPress. If you’re interested in a direct comparison, we’ve written a whole article comparing Wix and WordPress specifically for bloggers. Spoiler alert: WordPress wins.
To sum it all up – almost all serious bloggers today use a self-hosted WordPress site. It simply gives you so much more creative freedom and flexibility.
Don’t worry about signing up for a WordPress account yet – we’ll show you how to do so in the next step, via your web host.
Purchase your domain name, register for your web host and connect WordPress.
>> Skip ahead to Step #5: Design Your Blog
It’s time to make things official. Let’s go ahead and start setting up.
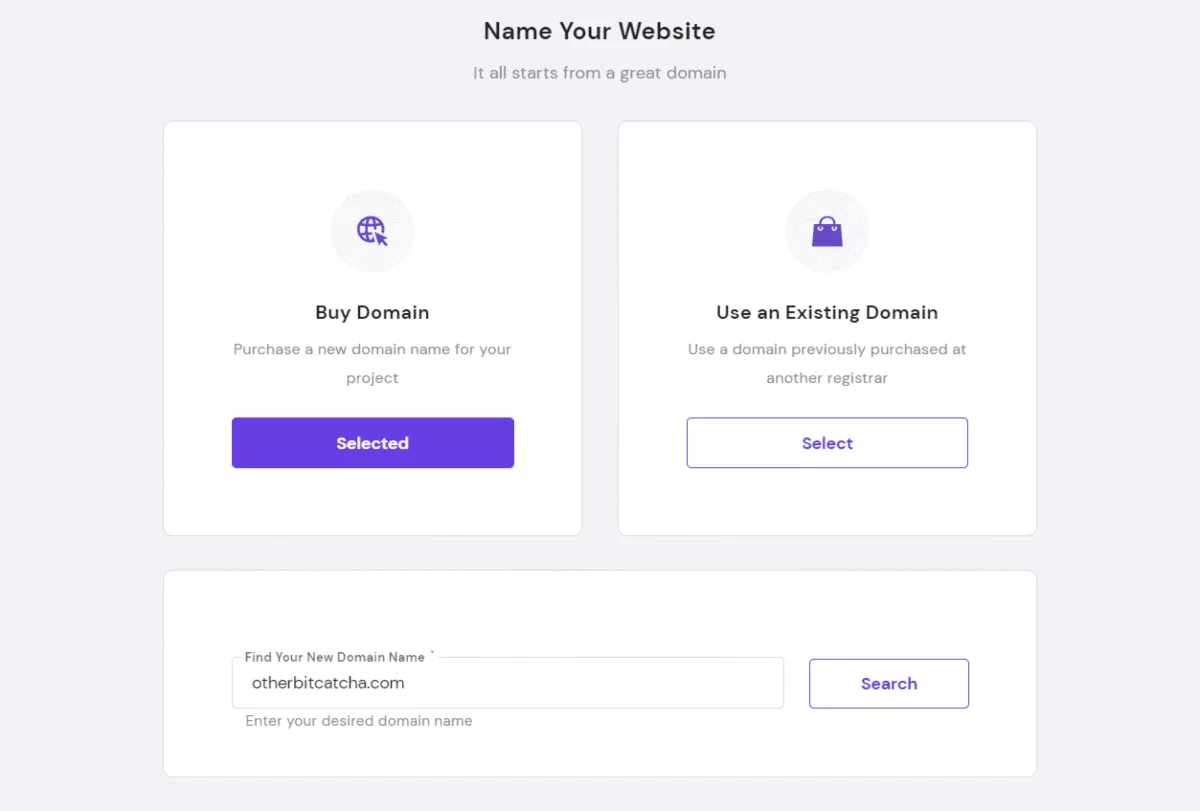
Now that you’ve decided your blog name from Step #2, it’s time to secure the domain.
Remember, you’ll want to pick a domain name that’s simple and easy to remember. No funky extensions like “.io” or “.biz” either, keep it to “.com” because it’s what most people are used to.
You can purchase your domain in 1 of 2 ways:
You might think that web hosting is just space for you to store your website files, and that any random web host will be fine, but you couldn’t be more mistaken.
In fact, if you want your blog to be successful, you better damn well make sure that you’re getting a web host that’s reliable and fast.
Have you come across a blog that loads so freaking slow that you just couldn’t be bothered to wait for the content to pop up? If you time yourself, you’ll see that 3 seconds is all it takes for you to feel that the blog is sluggish. 5 seconds is the average amount of time it takes for people to bounce.
Your web host is crucial in making sure that your blog performs quick and snappy.
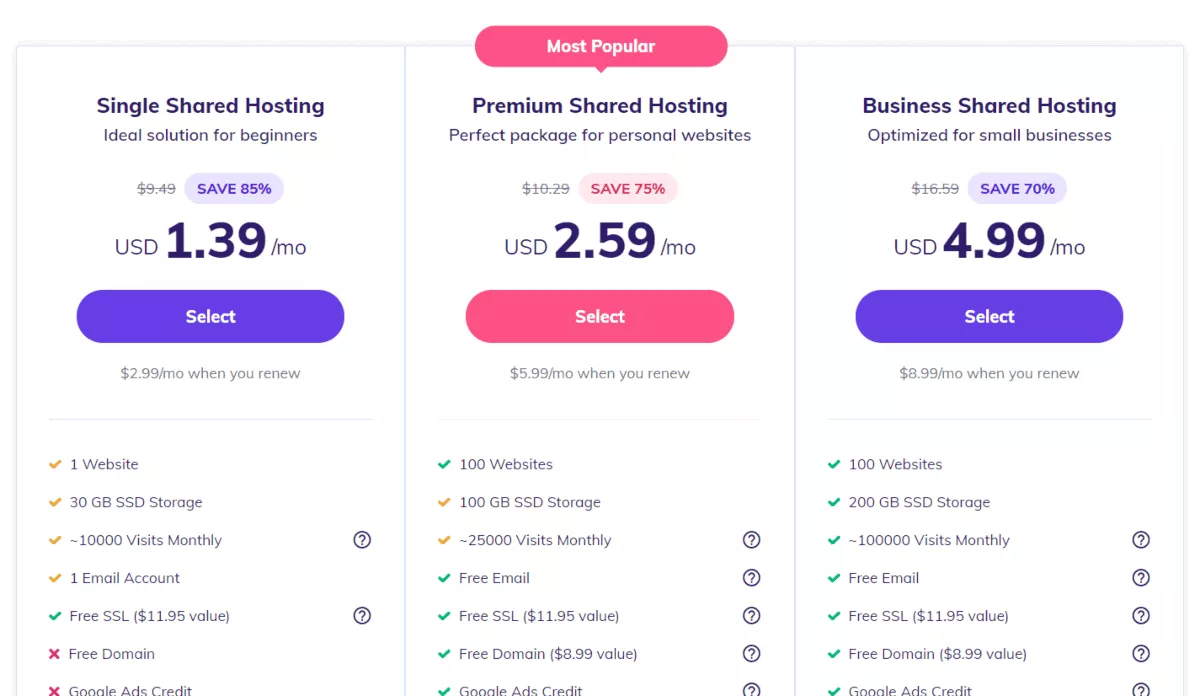
While there are plenty of web hosting services around (see our list of top web hosts) for bloggers who are just starting out – our #1 recommendation is to host your WordPress blog with Hostinger.
Note
Our research found that the combination of Hostinger + WordPress outperformed the rest as the best choice for most bloggers.
Hostinger’s uptime, dependable customer service, affordability and insanely fast server response times are absolutely brilliant. You can read our full review on the full list of Hostinger’s features here.
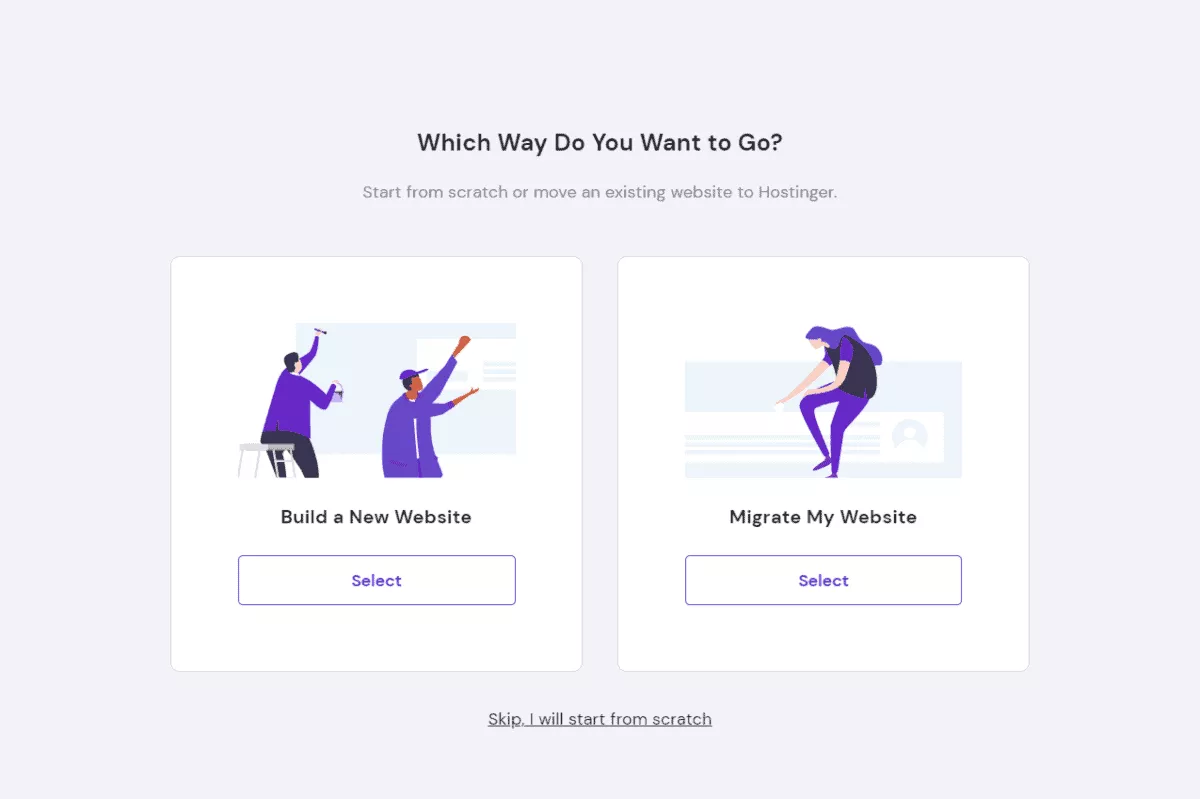
Let me walk you through the process.
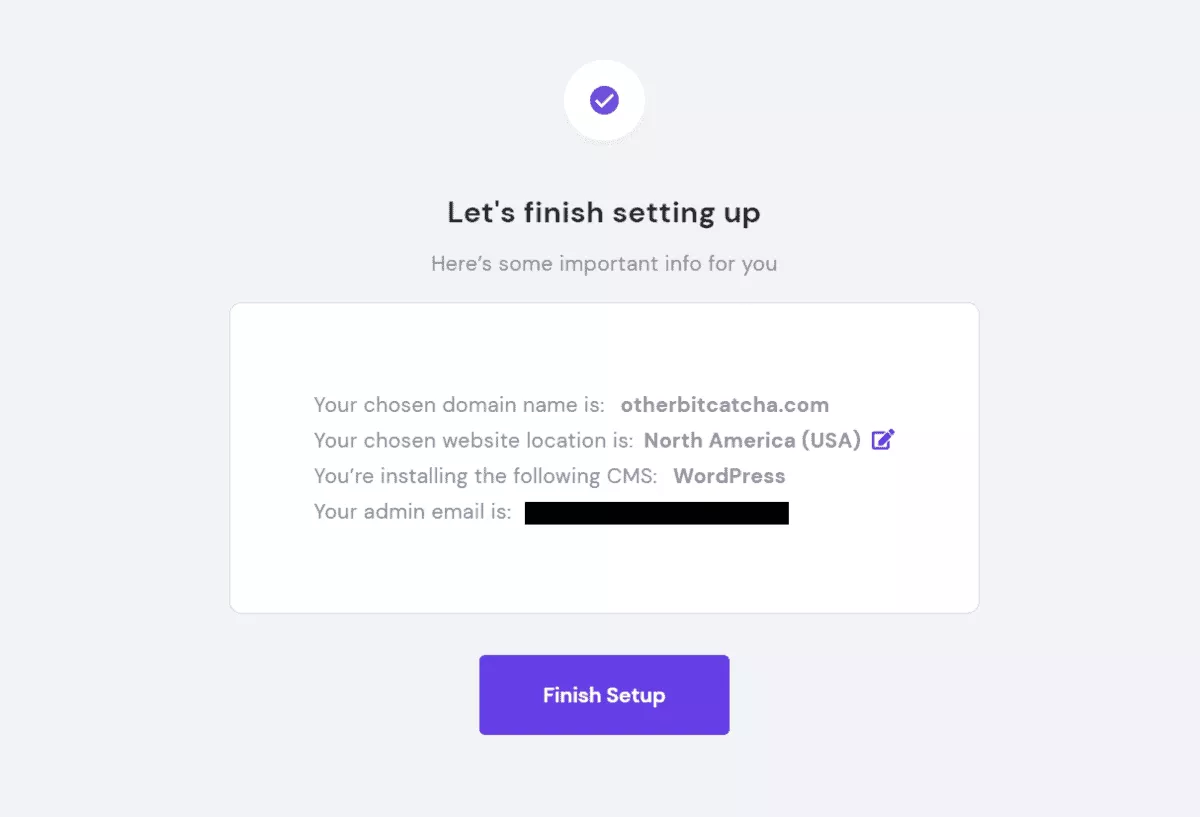
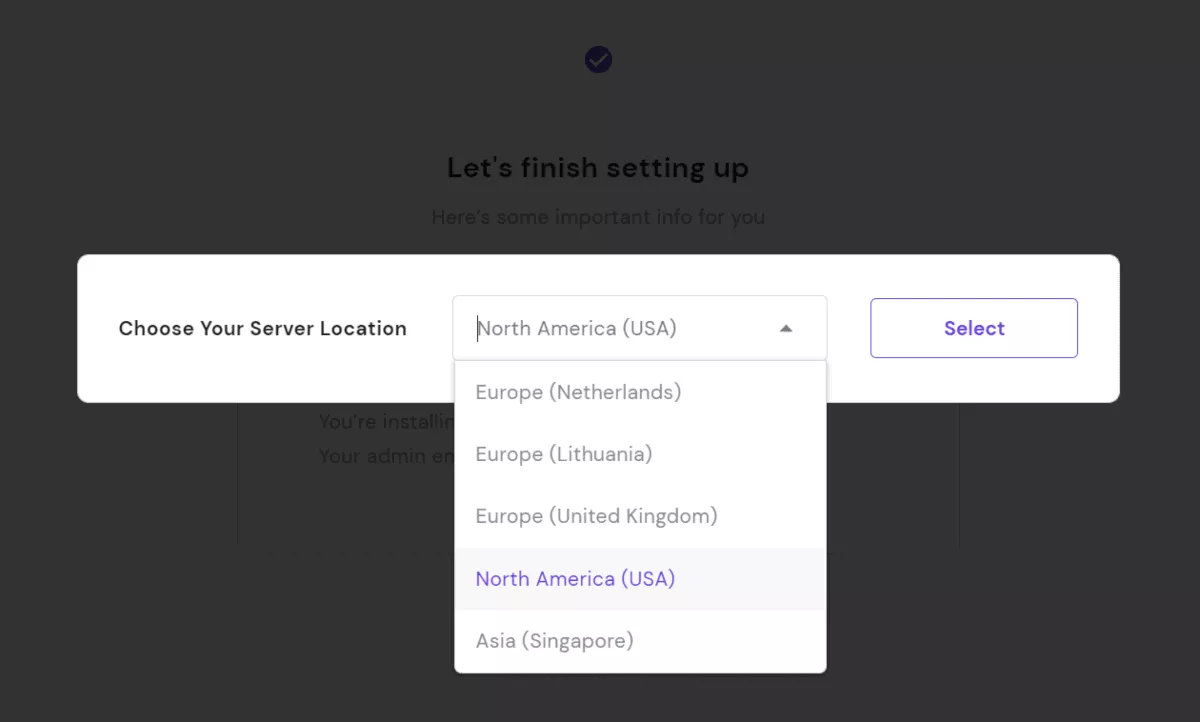
Getting an account and setting up your blog with Hostinger is really simple. Here’s what you need to do:
Voila! You now have a web hosting account and domain name all set up!
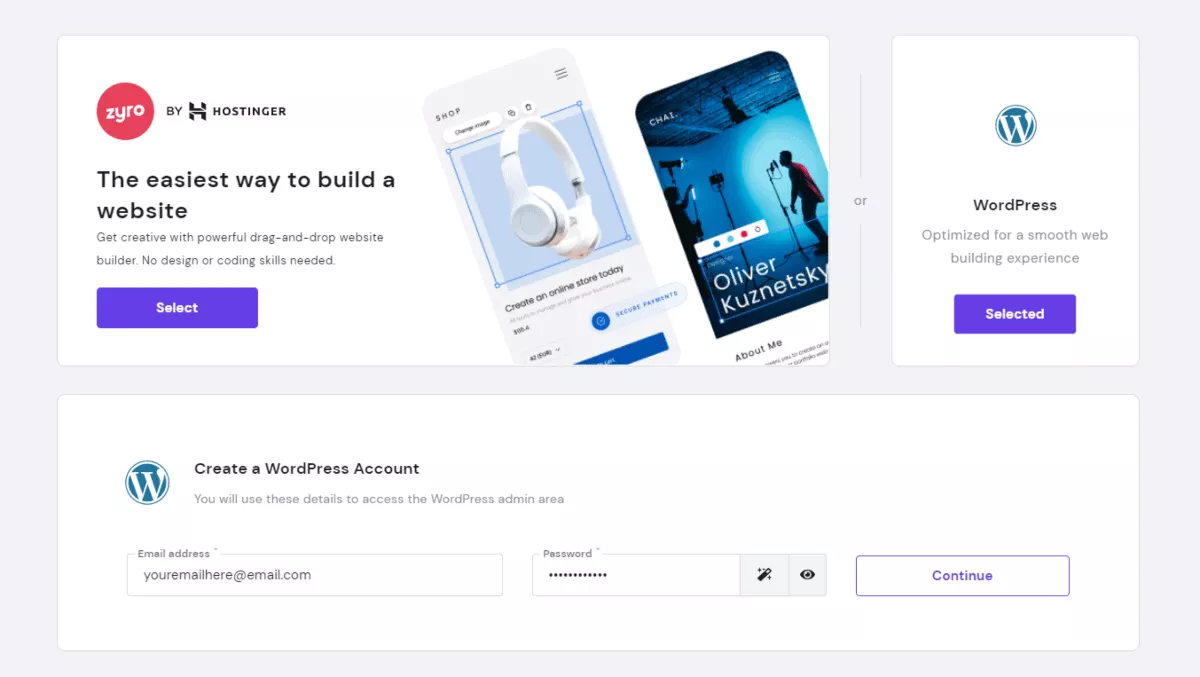
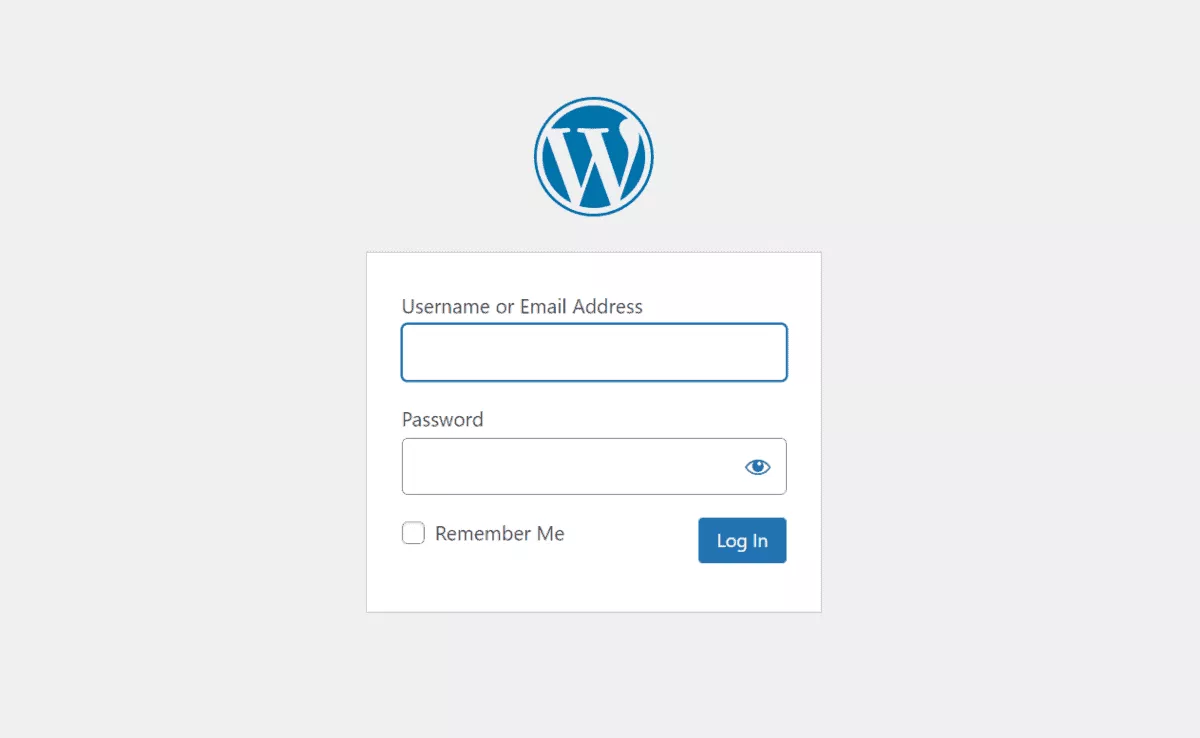
It’s now time to get it connected to WordPress. This is where your blog’s going to start looking like a blog.
This section is a continuation of the previous section, but we’re breaking it up into different parts for easy digestibility.
Note
If you get stuck during ANY one of these steps, don’t hesitate to contact Hostinger’s live chat support. They’re super helpful and will guide you through everything you need help with.
You now have your very own WordPress site! You should be proud of yourself.
So far, it’s nice and clean. Very zen. Also very generic. In the words of my younger friends, your site is currently “Vanilla AF”, so let’s do something about that, shall we?
Customize your blog by choosing a theme, setting up pages, using widgets and plug-ins, and more.
>> Skip ahead to Step #6: Publish A Blog Post
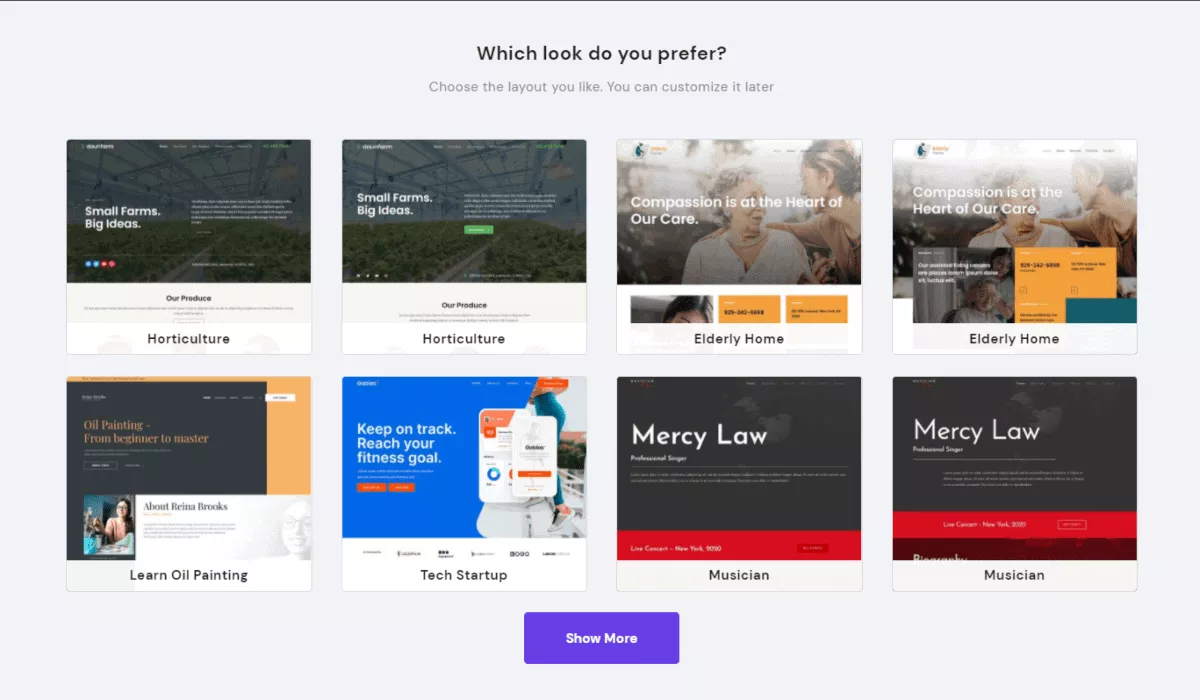
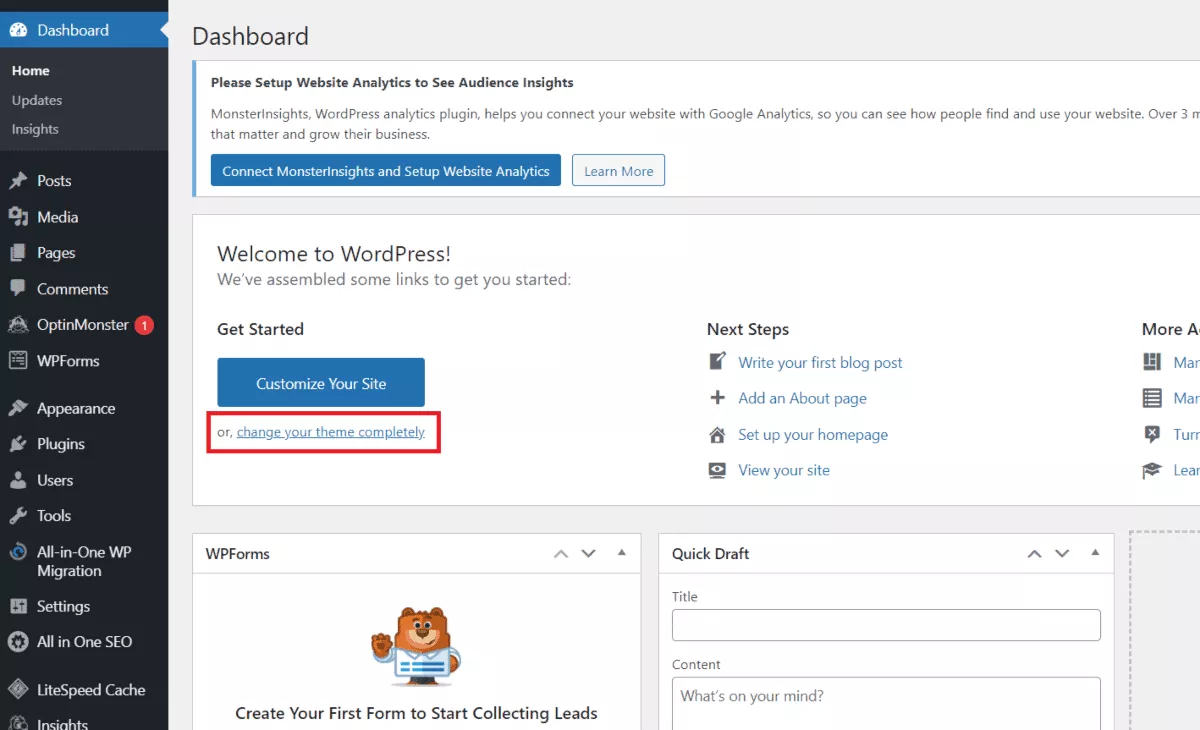
In this section, we’ll be taking a look at what we can look to give your blog a little more personality.
We can manually design and customize the blog to appeal to your targeted readers, but that takes a whole lotta time. Nahhh.

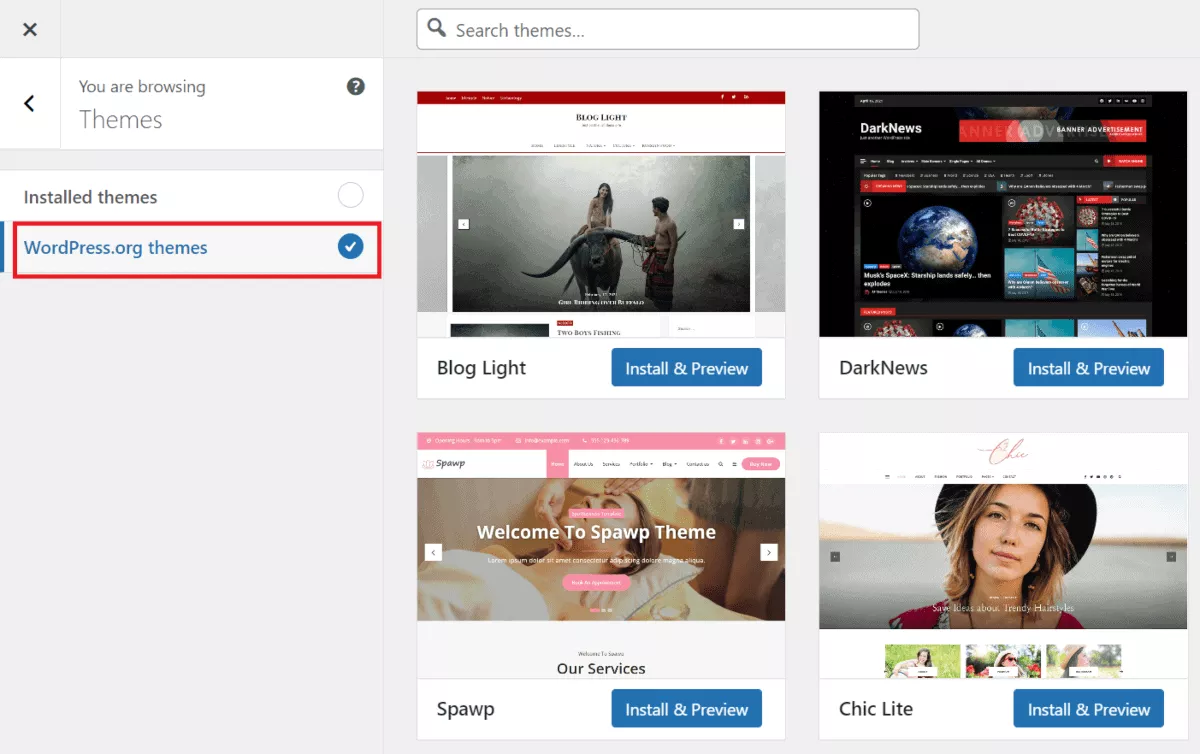
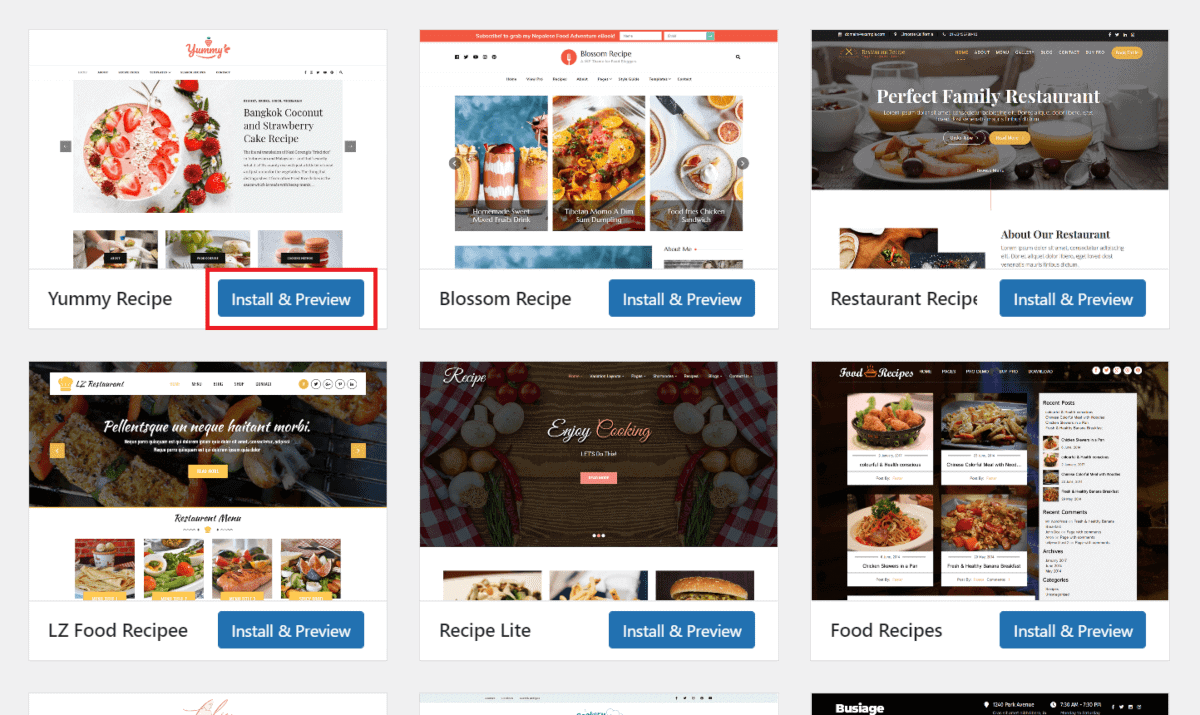
Fortunately, WordPress has thousands of free themes that are fully customizable, and also look highly professional!
Note
Themes are awesome but they can be tricky. Site load speed is crucial to getting your blog ranked on Google, and picking unoptimized or unresponsive themes will adversely affect your loading speed. Make sure to check out the comments for any negative reviews and test the theme’s responsiveness in the preview section. If the theme is already unresponsive in their own preview, it’s most likely gonna be sluggish on your blog.
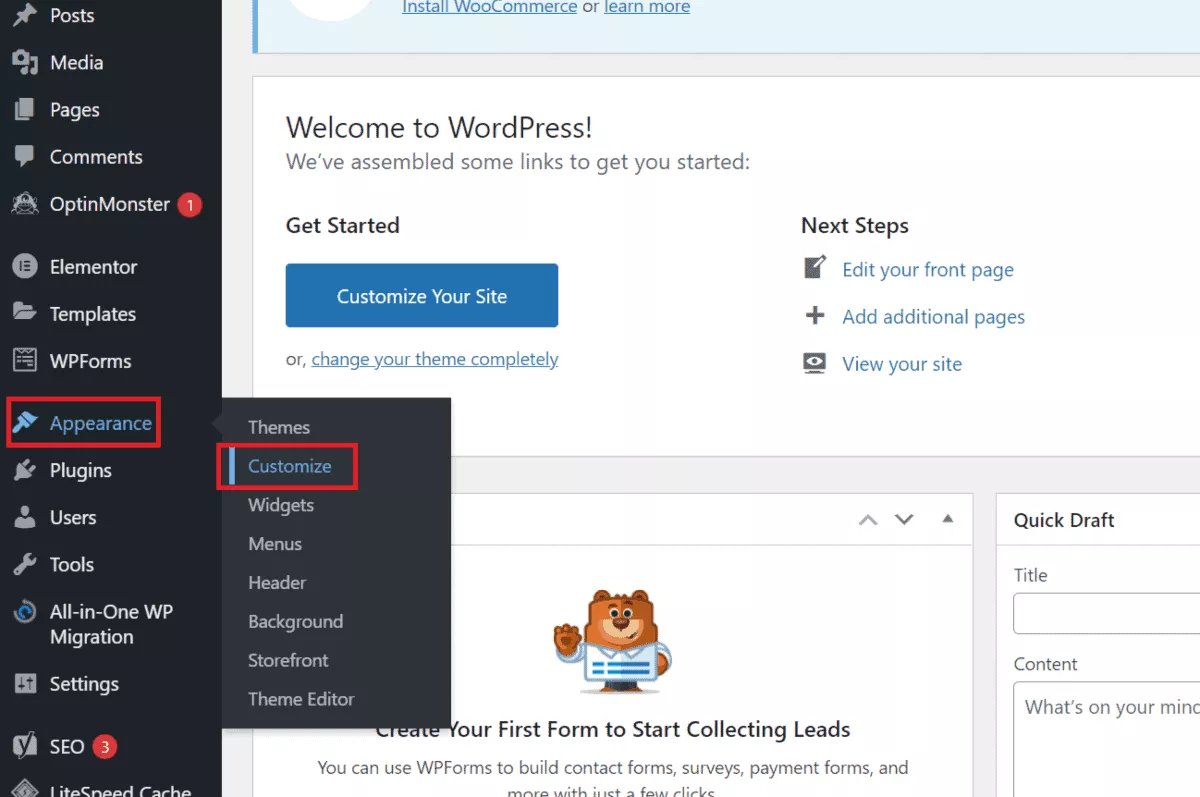
Your theme is now installed, but you’ll still want to personalize and add some content, or your new blog will look a little empty.
Whilst WordPress themes already come with their own design, you’ll probably want to tweak it further to your liking.
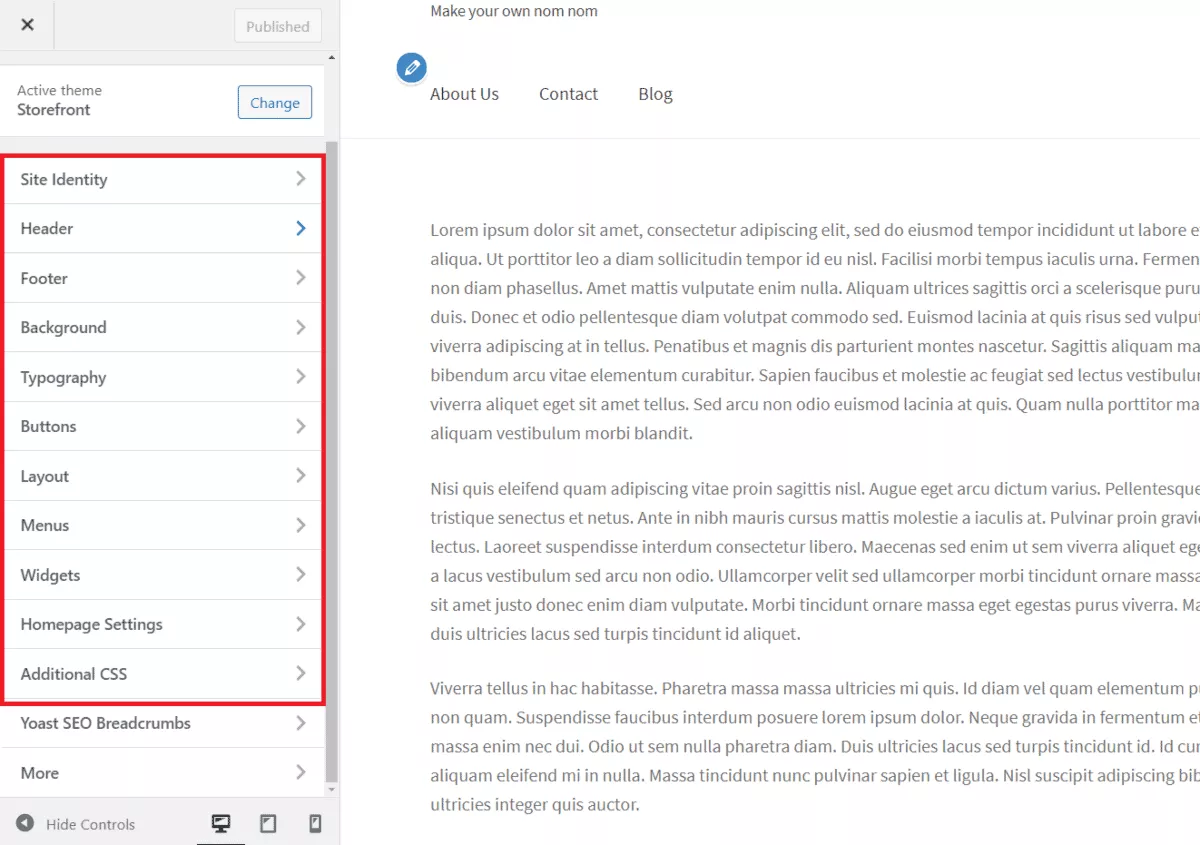
Different themes will display different options in the sidebar menu. However, the most common options that show up include:
Have a play around and see what you like!
If you want people to discover your blog and read your content, then you’ll definitely want to pay attention to this portion of the guide.
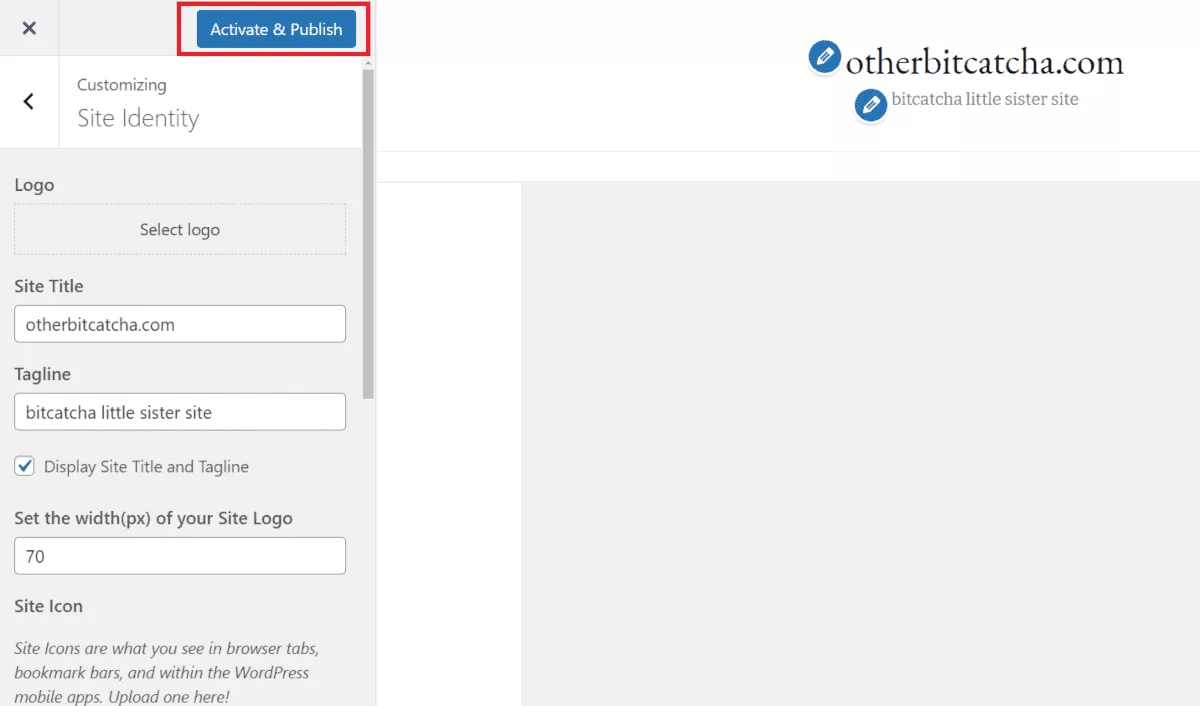
Your site title tells people what your blog is all about, and taglines help support what the titles say. They also help search engines sort and send your blog to the relevant searchers.
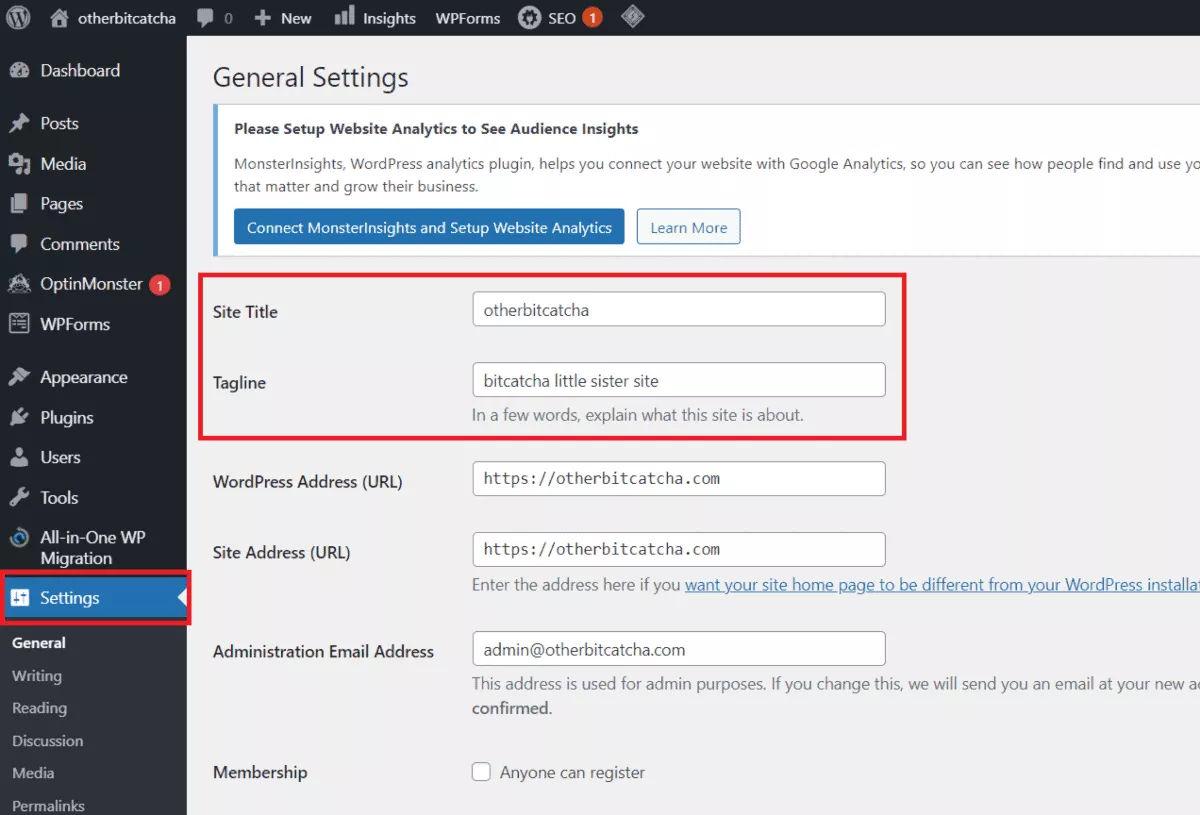
Here, you can change your site title and tagline to whatever you want it to be. Go ahead and do that, then hit “Save Changes”.
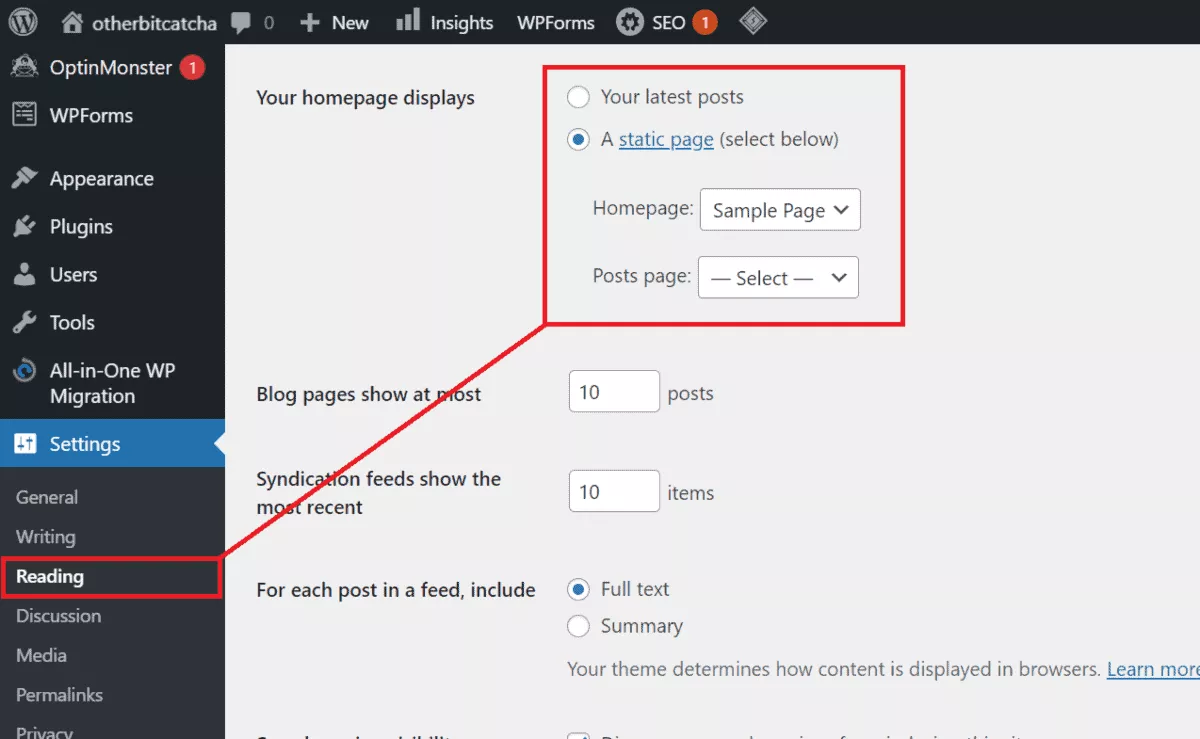
Yes you want to run a blog, but you don’t actually want your homepage to look like one!
What you’ll need is a static front page, a sort of “home” page for visitors to land on and take in everything they see.
Like most professional blogs, a static front page doesn’t change and it’ll show your readers something consistent every time they visit your site, making it look more polished.
If this isn’t done, WordPress will use your latest blog posts as your homepage which, quite frankly, can look very amateur.
You can create a static front page by doing this:
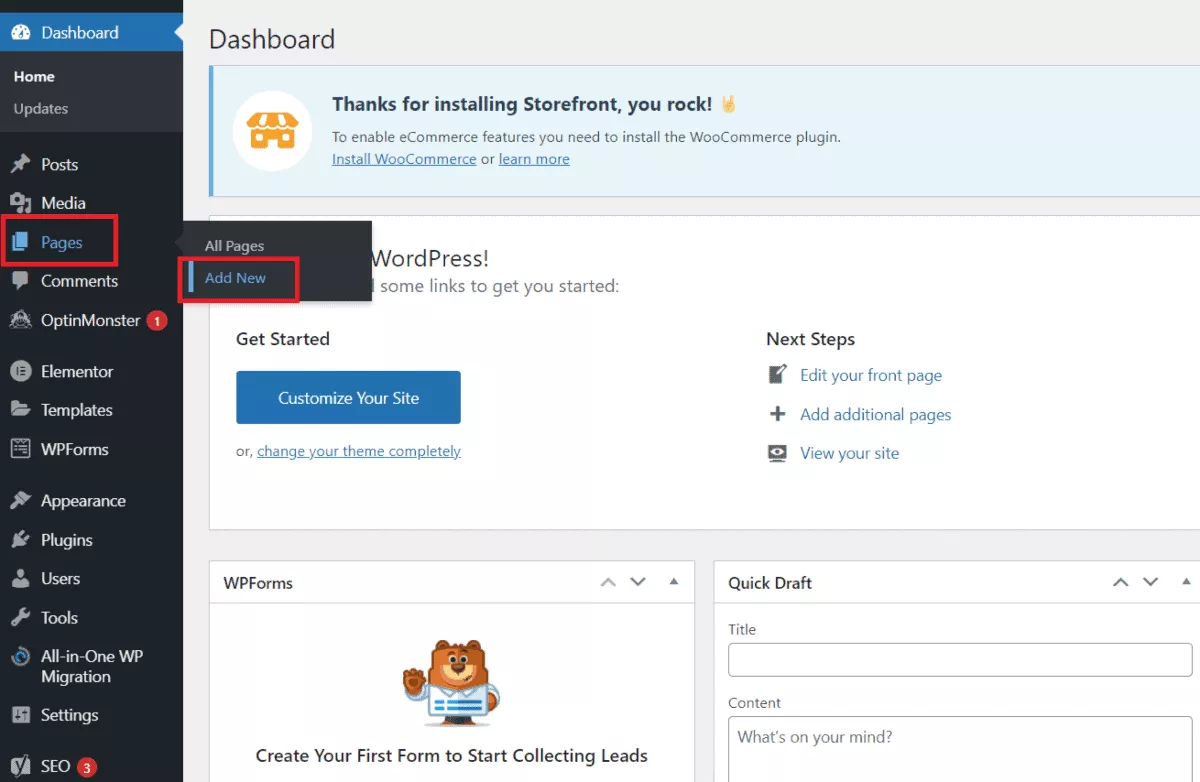
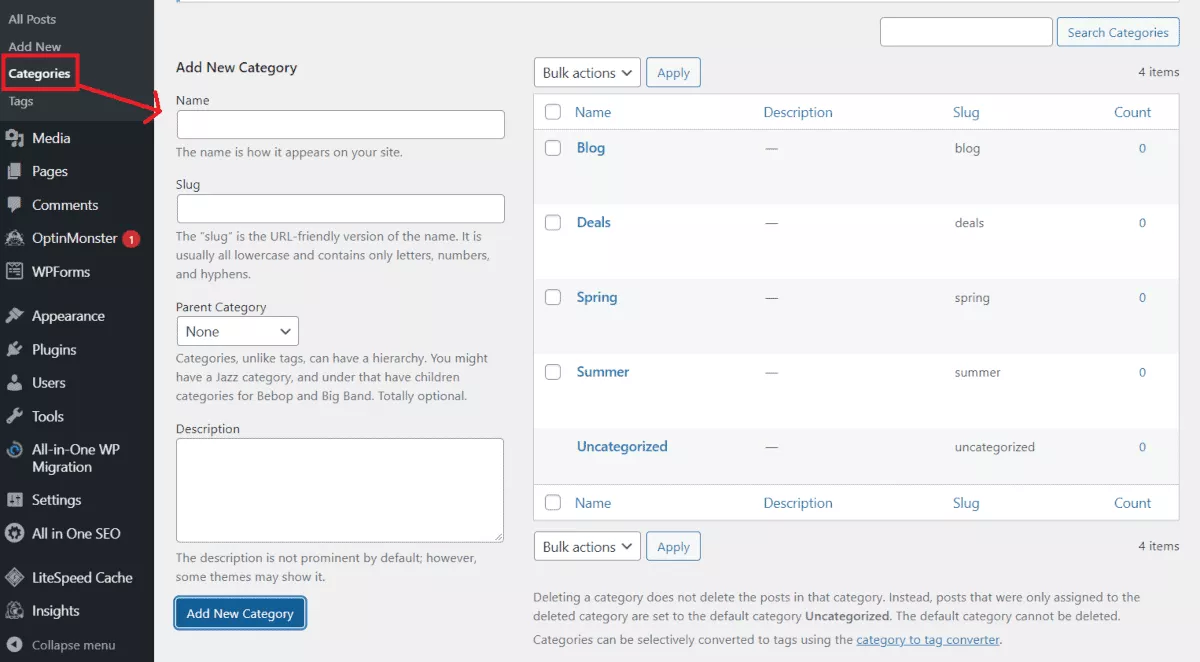
Your little blog baby is still pretty bare at this point, so let’s go ahead and add some pages.
Most blogs will include at least some of the following pages:
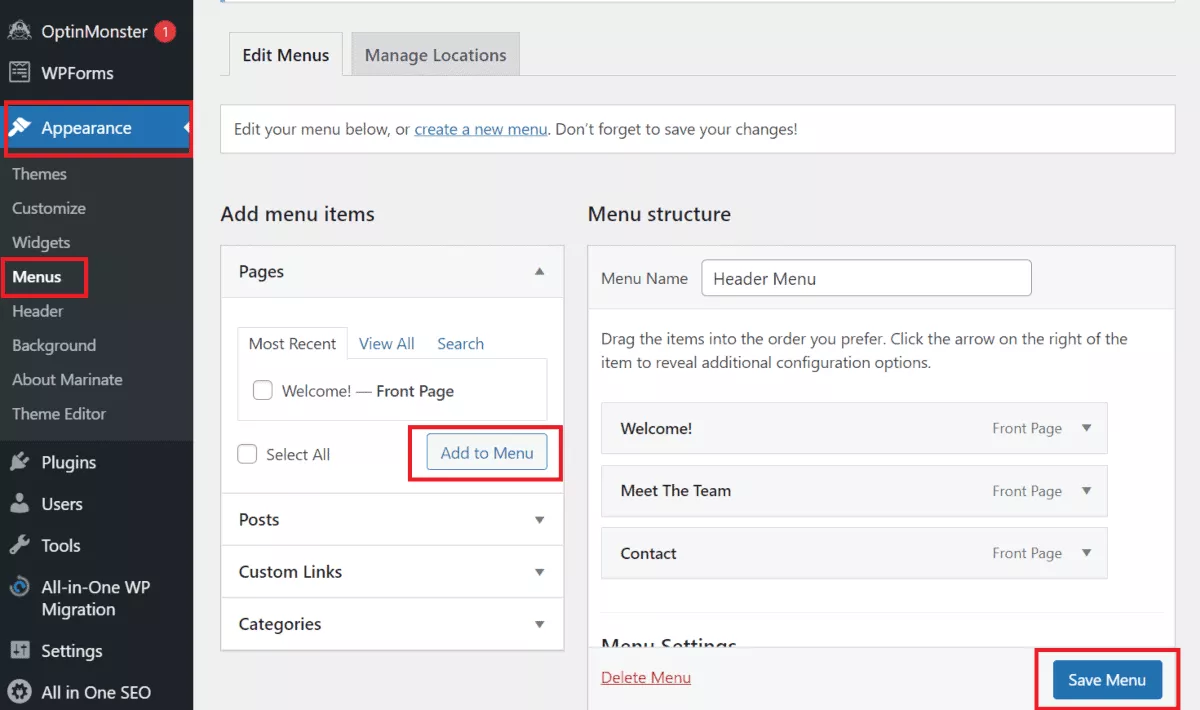
To start you off, let’s look at how to set up an About Us page on WordPress:
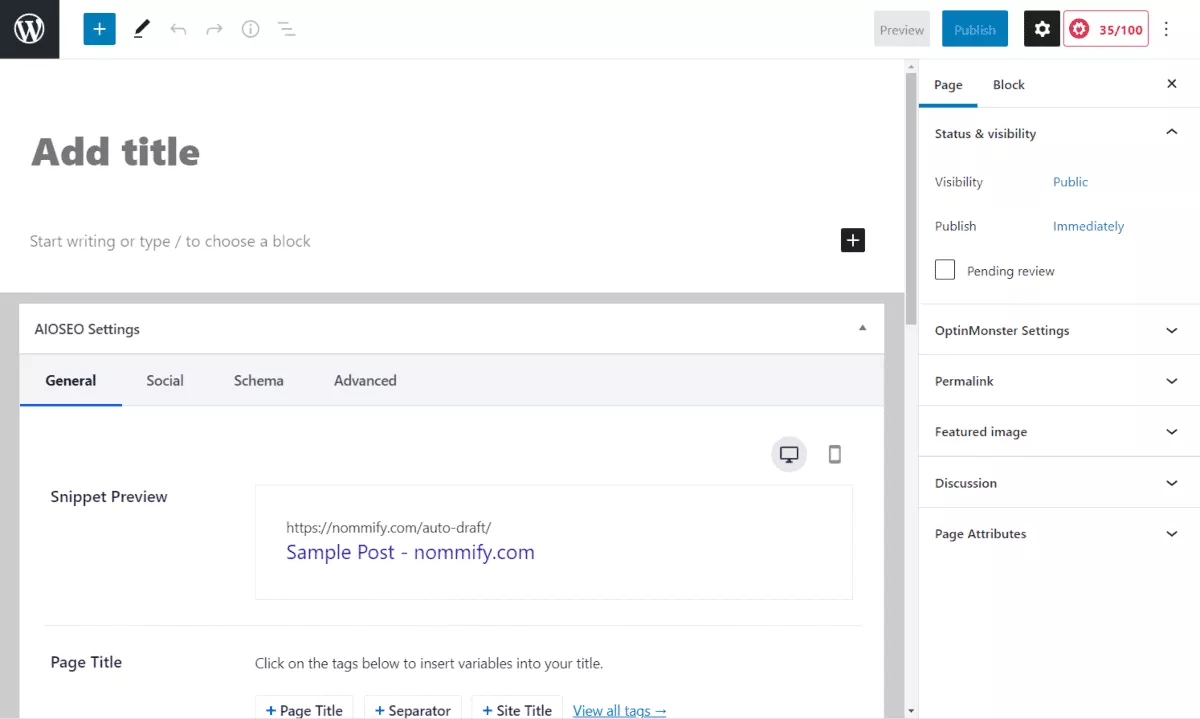
Your “About Us” page won’t show up unless you create a link for it in the menu.
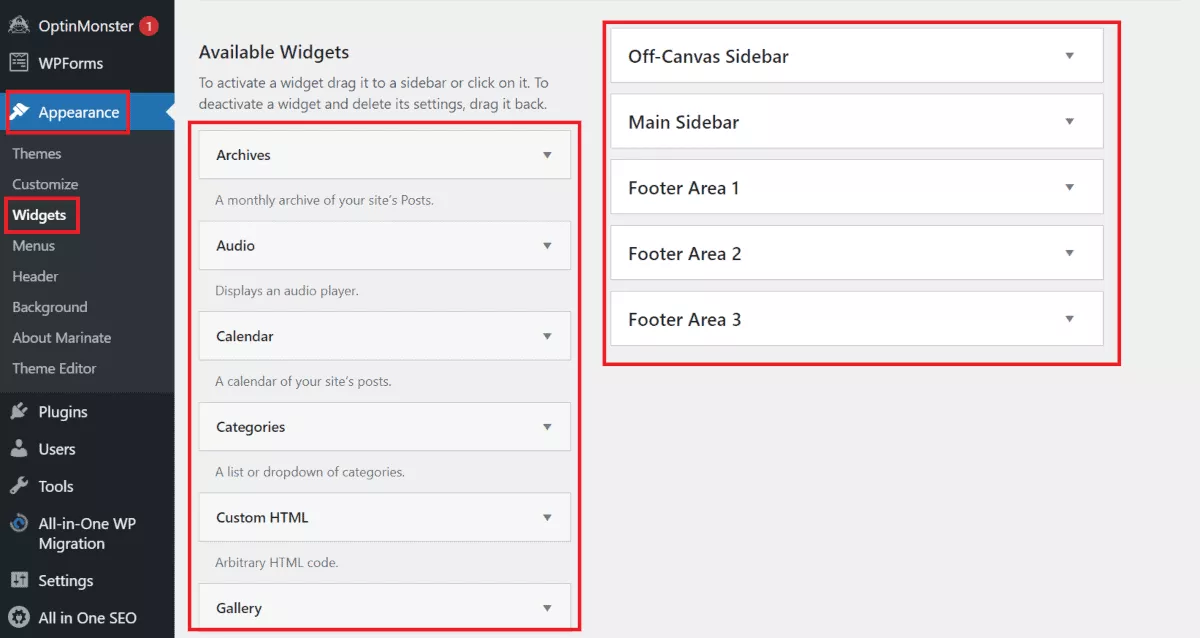
Some people want content on their sidebar. Some people prefer to go for a cleaner look and do away with it. Either way, it’s up to you.
Adding or removing content from your sidebar is quite easy.
In the past, when we wanted to optimize our blogs or add features, we had to do it manually (which is both time-consuming and a pain in the butt).
These days, you can do all that and more with just a few clicks, thanks to plugins!
Plugins basically let you add anything you want to your site. You can turn it into an online store or a gallery portfolio. If you can think of it, there’s probably a plugin for it!
What you’ll need to do to install plugins is under your WordPress dashboard, hit “Plugins” and “add new”. From there, just check out the popular or recommendations tab for plugins that suit your needs, and you’re done!
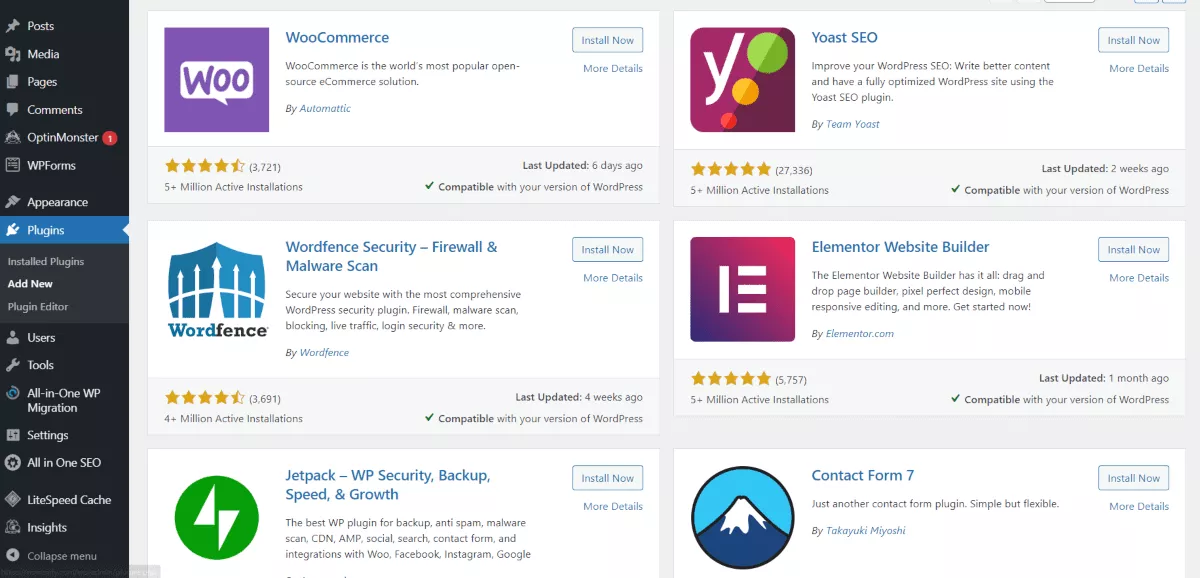
There is an endless list of plugins for you to pick from but keep in mind that some plugins might slow down your blog. Do a little research on plugins and your blog will run like a dream.
Here are some of our favourites plugins for bloggers:
Start writing and publishing blog posts on your new blog.
>> Skip ahead to Bonus Resources For Writing Content
Your framework is now complete!
That means it’s time to start writing blog posts (woohoo!) This is where the fun really begins.
Blog posts are the bread and butter of any successful blog. They help keep you relevant, keep your site ranked in Google searches and help you get your message out there.
Everyone has their own blogging style and voice.
The most important thing is that blog posts need to offer something valuable to readers so that they want to come back to your blog for more.
As for the blog writing process – it gets easier when you break it into 5 simple steps:
For detailed instructions with examples, check out our step-by-step guide on how to write great blog posts people actually want to read.
Like taking that first plunge into cold water – many people often find that the hardest blog post to write is the FIRST.
Most bloggers will adopt 1 of these 2 strategies for their first blog post:
The choice is up to you. To figure out which is right for your blog, check out our full guide on exactly what to write for your very first blog post.
Once you have your final blog post draft, it’s time to put it out there in the world!
Let’s quickly sort out some things on WordPress in preparation for making it live.
Congratulations – you’ve now published your first blog post!
You’re off to a great start, but part of being a successful blogger is being able to write high-quality content on a regular basis.
Here’s some further reading to help you out on this front:
Congrats random person in the blogosphere, you’ve successfully built your own blog!
We helped, but you did all the heavy lifting by yourself, so you should really give yourself a pat on the back.
Before you go, here’s a quick refresher on how to start your blog.
And remember – keep on customizing!
Remember, WordPress is highly customizable. You can really create any kind of blog you want with WordPress, so keep on experimenting and customizing until you’re 100% happy with what you’ve got.
Now – go forth and blog! We can’t wait to see what you come up with.
A website consists of multiple static “pages” that may not be updated frequently and are usually used as an online tool, or to sell a product or service. A blog is a type of website that usually has a focus on written content and is regularly updated, hence it is dynamic. Blog content tends to be referred to as “posts”.
Yes. There are free web hosting services and blogging sites that let you set up a blog for free, however these all tend to come with significant performance restrictions and even display ads, which you’ve no control over. These free options can suit casual bloggers, but you should stay away from these if you’re looking to make a business out of your blog.
How often you should blog will depend on your resources, niche, and audience. In most cases, the higher your blogging frequency, the more the organic traffic your blog receives.
Establish your blog’s online presence. You can start by producing high-quality content regularly, optimizing it for search engines, and looking into outreach strategies such as guest posting.
The best way and arguably the most important factor to get traffic is to simply write quality content. By writing useful and relevant content for your target audience, your blog is more likely to rank well in web searches, exposing it to more search traffic and eyes.
Bloggers can earn through a variety of methods, but the main 2 are by placing ads on your blog, or through affiliate marketing. Placing ads is very low maintenance, all you have to do is literally place them and forget (often through an ad network), however, the income generated is generally quite low unless you have large traffic. Affiliate marketing requires a lot more effort to maintain, but the potential for profit is much higher.
Our recommendation is WordPress. Wix lets you make a beautiful blog effortlessly, and is easy to use; but you won’t be able to move your blog anywhere else once it grows big and needs more resources. With WordPress, you have access to many more custom tools and can scale your blog and ensure it has the biggest earning potential. Read our Wix vs WordPress comparison.